
![]() The new Aero interface of Windows Vista looks really nice, but after a while you get bored of the same colors and shapes. This is why in this tutorial I will show you how to install a new theme on Windows Vista. The process is not an easy one, as we need to install some additional software, but the result will be quite satisfying.
The new Aero interface of Windows Vista looks really nice, but after a while you get bored of the same colors and shapes. This is why in this tutorial I will show you how to install a new theme on Windows Vista. The process is not an easy one, as we need to install some additional software, but the result will be quite satisfying.
IMPORTANT: Before starting this procedure you should log on as an administrator. If your user is not administrator, the procedure will fail.
If User Account Control (UAC) is enabled, you will be asked for permission each time you copy files to important Windows folders such as the ones mentioned below. Each time it shows up, click on Continue and the files will be copied over.
Before starting this procedure, it is recommended to create a System Restore snapshot. In case of failure, it will be very easy for you to revert back to the initial state.
Also, keep in mind that this tutorial is published with no warranties. We are not responsible for any problems you might have with your system. We tested everything multiple times on two separate computers and we did not encounter any problems. However, this is not a warranty that the procedure will work the same on all computers & configurations.
Installing VistaGlazz
The first step is to install a software called VistaGlazz.
Before you do this, you need to check if you have Windows Vista or Windows Vista with Service Pack 1 installed.
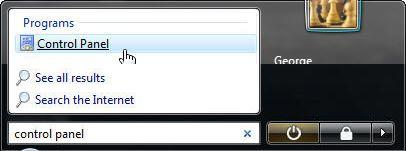
You can find out by opening the 'Control Panel'. Type 'control panel' in the Start Menu search bar and click on the first result. Alternatively, you can just click on its Start Menu shortcut.
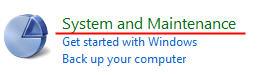
Then click on 'System and Maintenance'.
And then on System.

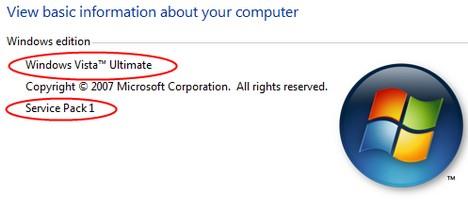
Here you can see if you have Service Pack 1 (SP1) installed or not.
This is how it looks when you don't have SP1 installed.

And this is how it looks when you have it installed.
If you have SP1 installed then go to the CodeGazer homepage and download the latest version of VistaGlazz that is compatible with Windows Vista SP1. Right now, this version is VistaGlazz beta 3. Alternatively you can download it by clicking on this direct download link.
If you have Windows Vista without SP1 then, from the same page, download VistaGlazz 1.0. Alternatively you can download it by clicking on this direct download link.
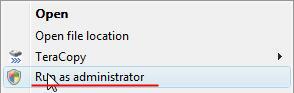
After the download is done, run the setup and install VistaGlazz. Now run the application with administrative rights by right clicking on its desktop icon and selecting 'Run as administrator'.
When launched, click on 'I agree' to continue.
Now, three icons will appear: the first one will show you the status of the system '.dll' files from your computer, the second icon will show you the status of the '.msstyle' files and the last one will offer you different ways to contact the developer of the application.
Patching '.dll' and '.msstyle' files
Now click on the first icon and then on 'Patch originals' in order to replace the original '.dll' files with the ones that would allow you to install themes.
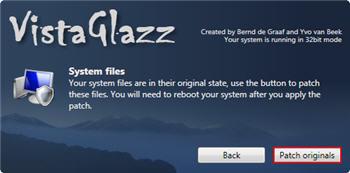
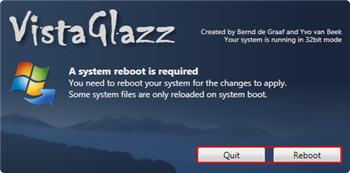
After the patching process you will have to reboot your PC. Click on the Reboot button or, if you intend to restart later, click on the Quit button.
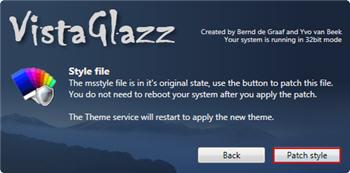
After the restart, run VistaGlazz with administrative rights again, click on 'I agree' and then on the second icon.
Now, click the 'Patch style' button and the Windows Vista theme engine will restart in order to apply the changes made to the original files.
The first change that you should see is that the taskbar and titlebar are now transparent even if a window is maximized. Now you can close the VistaGlazz application.
Tip: If you want to restore your original Windows Vista theme files, open VistaGlazz and click on the first icon. Click on the 'Unpatch files' button and restart your PC. Then open VistaGlazz again, click on the second icon and click on the 'Restore original' button. After this, your default Windows Vista theme files will be restored.
Installing a new theme
The best place to search for new Vista themes is deviantart.com.
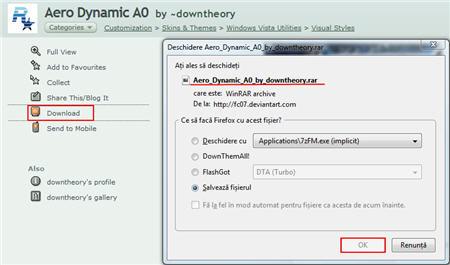
For demonstration purposes I will install a theme called Aero Dynamic. In order to install it, click on the 'Download' button from the left and save the file on your disk.
Now extract all the files from the archive.
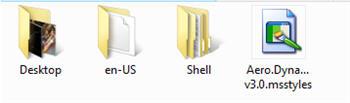
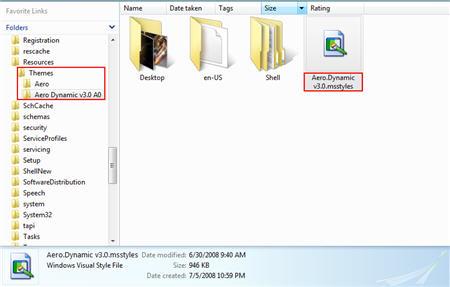
Each valid theme has to have the files and folders shown in the screenshot above: en-US, Shell, a file with the '.msstyle extension and a file with the '.theme extension.
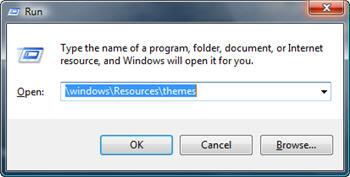
Now you need to copy these files and folders to your Windows Vista Themes folder. First, open Windows Explorer and navigate to 'C:\Windows\Resources\Themes' or go to the Run button, click on it, type '\Windows\Resources\Themes' and click on OK.
Here copy the folder with the theme that you wish to install and, if any, the file with the '.theme extension.
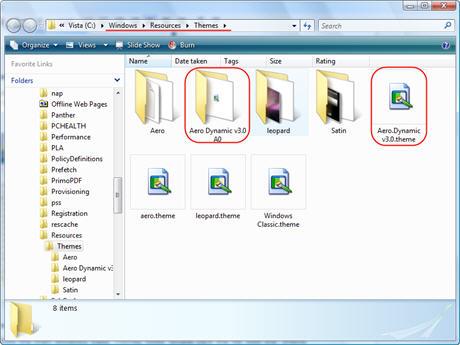
Then, double click the file with the '.theme' extension. In my case that file is 'Aero.Dynamic.v3.0.theme'.
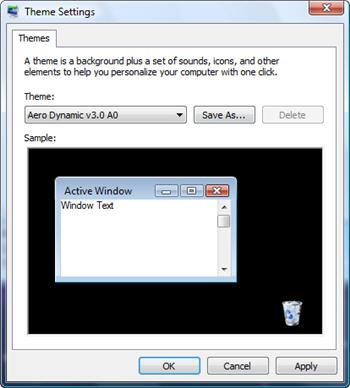
A new window called Themes Settings will open. If the theme that you want to install is already selected, click on OK.
If there is no '.theme' file, enter the theme's folder and double click on the file that has the extension '.msstyle'. In my case that file is 'Aero.Dynamic.v3.0.msstyle'.
Right after you double clicked that file, a new window will appear with the Appearance Settings of Windows Vista.
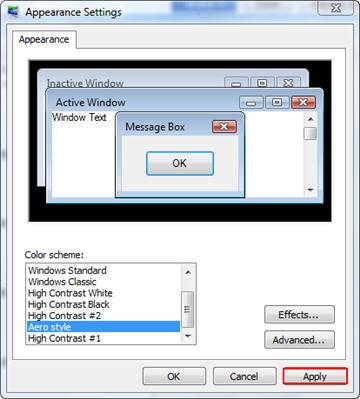
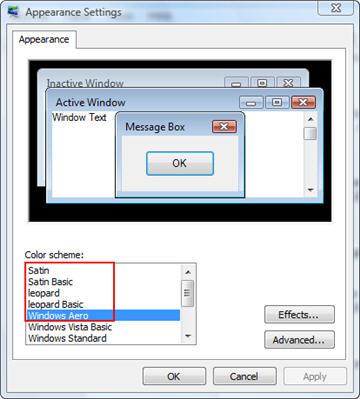
Scroll down the color schemes until you find your theme. However, you should keep in mind that, by default, all the newly installed themes are named 'Aero style'. Select it and then click on 'Apply'.
After a short 'Please wait' moment and possibly a blank screen, your new theme will be applied.
Tip: If the theme has additional files or folders, read the 'Readme.txt' file and follow the instructions.
Rename the newly installed themes with VistaDeskHack
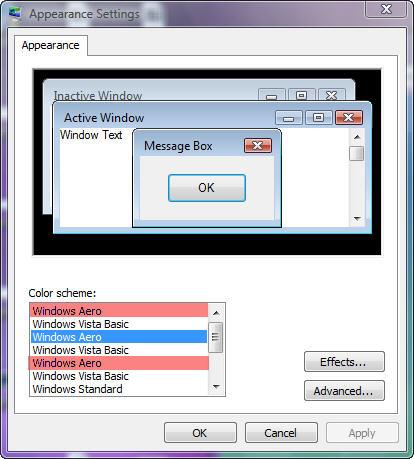
If you have multiple themes installed, you might have noticed that in the Appearance Settings window they all have the name 'Windows Aero'.
In order to change this and see their real name, you have to install a small application that will auto-rename each theme. The software application name is VistaDeskHack 1.1 and it can be downloaded from RapidShare. Alternatively, you can download it directly from our site. You will find it at the bottom of this page.
Download and extract the archive. Open it, right click on the DeskHack_Install.cmd file and select 'Run as administrator'.
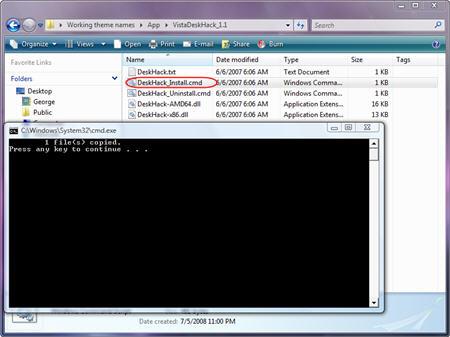
A Command Prompt window will open and after a second a message that says: '1 file(s) copied. Press any key to continue...' will appear. Press any key and the window will close.
When you will open the Appearance Settings window all the new themes that you have installed will have their own 'original' name. To open the Appearance Settings window, right click on your Desktop and select Personalize -> Windows Colors and Appearance -> 'Open classic appearance properties for more colors options'.
How to revert to the default Aero theme
If for some reason you don't like the themes you have installed, reverting to the default Vista Aero theme is quite easy:
right click anywhere on your desktop and select Personalize.
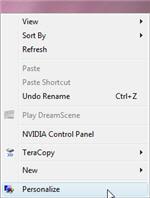
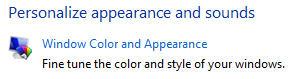
Now click on Windows Colors and Appearance.
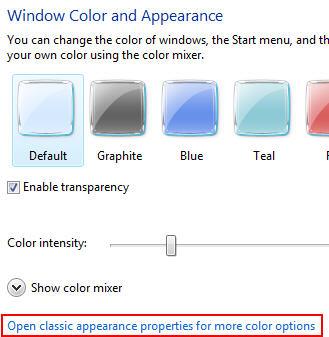
Then click on the 'Open classic appearance properties for more colors options' link.
From the new window select Windows Aero and click OK.

Popular Posts
-
We have posted about " Windows 7 Little Tweaker " in past which allows you to tweak a few interesting things in Windows 7. Today w...
-
We all customization lovers know that we need to take ownership of a system file before replacing or modifying the file in Windows. Almos...
-
 Tentunya para blogger atau siapa-pun ingin agar web atau blog-nya mendapatkan predikat atau yang biasa disebut dengan pagerank-nya bisa ...
 -
This feature is called " Password Reveal Button " or " Show Password Button ". You might have noticed that whenever yo...
-
 The perfect storm is on the loose … harness it’s energy while picking up objects in its path. Your storm gains force and life by eating ...
 -
 Mbah dukun ini benar-benar mantep ilmu sihirnya, ini adalah kejadian nyata dimana dukun ini telah melakukan perbuatan cabul kepada ...
 -
If you can't see your optical drives (CD/DVD Drives/Writers) in My Computer, then this tutorial will help you: 1. Type regedit in RUN d...
-
Recently one of our reader " James " asked us about following problem in an email: Whenever he tries to start " Speech Recog...
-
 ArcSoft Audio Decoder Pack It’s important to note that changing a filter’s merit probably won’t have an immediate effect. At the...
 -
We all know that Microsoft has completely removed " Start button " and " Start Menu " from Windows 8 . Actually the new ...


0 comments:
Post a Comment