Friends

This is default featured post 1 title

Go to Blogger edit html and find these sentences.Now replace these sentences with your own descriptions.This theme is Bloggerized by Lasantha Bandara - Premiumbloggertemplates.com.

This is default featured post 2 title

Go to Blogger edit html and find these sentences.Now replace these sentences with your own descriptions.This theme is Bloggerized by Lasantha Bandara - Premiumbloggertemplates.com.

This is default featured post 3 title

Go to Blogger edit html and find these sentences.Now replace these sentences with your own descriptions.This theme is Bloggerized by Lasantha Bandara - Premiumbloggertemplates.com.

This is default featured post 4 title

Go to Blogger edit html and find these sentences.Now replace these sentences with your own descriptions.This theme is Bloggerized by Lasantha Bandara - Premiumbloggertemplates.com.

This is default featured post 5 title

Go to Blogger edit html and find these sentences.Now replace these sentences with your own descriptions.This theme is Bloggerized by Lasantha Bandara - Premiumbloggertemplates.com.

Monday, April 4, 2011

How to Remove Program Icons from Windows Titlebar and Taskbar Buttons?

Today we are going to share a very small utility which can hide program icon from its window and Taskbar button. Why to use it? Actually lots of people like minimal look and as you can see Microsoft removed icons from Explorer toolbar to make it minimal, the same thing applies for Taskbar buttons. No_Titlebar_and_Taskbar_Button_Icon.png
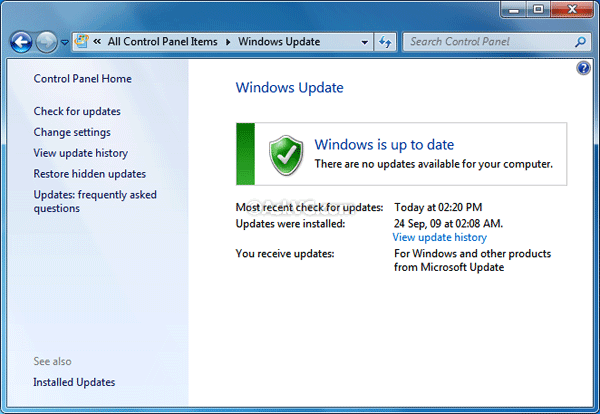
As you can see in above screenshot, the program icon is not visible in window titlebar as well as in Taskbar button.
This utility works in Windows XP, Vista and 7. But in Vista and 7, it only hides titlebar icon, Taskbar button icon remains visible.
You can download the utility from following link:
Download Link
Simply run the EXE file and enjoy the minimal look.
To get the icons back, open Task Manager (by right-clicking on Taskbar and select "Task Manager" or by pressing "Ctrl+Shift+Esc" keys together) and End Task of "TBarIconBlanker.exe".
You can add its shortcut to "Startup" folder in All Programs menu to start it automatically with Windows.
This utility has been developed by "skwire" @ Donationcoder. Thanks to St-Ang3R @ DA for sharing it...

Microsoft Released Updates for Windows XP, Server 2003 and Vista to Restrict AutoRun Entries in AutoPlay Dialog to Only CD and DVD Drives Just Like Windows 7

Windows 7 comes with a new enhancement in "AutoRun" feature which restricts the AutoRun entry to only CD and DVD drives. It helps in keeping your system safe from malware, etc. Now a good news for Windows XP, Server 2003 and Vista users. Microsoft has released an update "KB971029" for XP, Server 2003 and Vista which brings the same feature to these older Windows versions.
AutoRun_Windows_7.png
You can download the updates using following links:
Download Update for XP
Download Update for Server 2003
Download Update for Server 2003 (64-bit)
Download Update for Vista
Download Update for Vista (64-bit)

Permanently Set Process Priority in Windows Task Manager Using Prio

Do you know "Windows" shares the processor time between all running processes based upon their priority? If a process has higher priority, it gets more processor time compared to a process having lower priority. But we can change process priority using "Windows Task Manager". Open Task Manager by right-clicking on Taskbar and select "Task Manager" or by pressing "Ctrl+Shift+Esc" keys together.
Once you open Task Manager, go to "Processes" tab, right-click on any running process and change the priority using "Set Priority" menu. You'll notice some system processes are set to "High" priority and almost all 3rd party processes are set to "Normal" by default.
Although you can change the priority according to your requirement, but the priority is not set permanently. Once you restart your system, Windows forgets your custom priority and assigns the process default priority.
So how to set a process priority permanent? Don't worry, here is the solution.
"Prio" is a free for personal use utility which solves the problem. It adds a new option "Save Priority" in "Set Priority" menu:
Save_Process_Priority.png
So now you can save the priority permanently.
It works in Windows XP, Vista and 7. It also adds a few extra features as mentioned below:
  • Adds a new tab "Services" which shows the installed processes along with their status
  • Adds another new tab "TCP/IP" which shows all established TCP/IP connections and all open ports
  • Adds a new option "Silent Elevation" which allows you to execute a software with administrative privileges
You can download it using following link:
Download Link
Download Link (64-bit)

Homepage

How to Create Removable Media Shortcuts Automatically on Windows Desktop?

Whenever you insert your USB drive into your computer, Windows shows the Autorun dialog box and asks you "What do you want Windows to do?". But the Autorun dialog box is shown only once and if you close it, you'll need to manually open the drive from My Computer. Consider a situation when you disabled "Autorun" feature to prevent virus infection. Again you'll need to manually open the drive from My Computer.
Wouldn't it be great and easier if you can add a shortcut to your USB drive on Desktop so that you can easily and quickly open the drive?
Today we are sharing 2 FREE utilities which can add shortcuts to USB drives, CD/DVD drives, hard drives, network drives and RAM disk drives.
1. Desktop Media:
Desktop Media is small application for Windows (any flavor) that automatically adds drive icons to your desktop. It will detect USB drives, fixed drives (ie. your hard drives), CD/DVD drives, network drives, and even RAM disk drives. For removable media (such as USB drives and CD/DVD drives), it will only add the drive to your desktop if it is present. So if you have a CD/DVD drive, but no disc is present, you won't see the icon on your desktop.
Features List:
  • Automatically detects new (or existing) media and adds the icons to your desktop.
  • Has the ability to create soft links (shortcuts) or hard links (symbolic links).
  • Supports removable, fixed, network, CD/DVD, and RAM disk drives.
  • Ability to ignore user-specified drive letters.
  • Has the option to save the positions of the icons.
You can access it settings using its system tray icon.
You can select which drives shortcuts you want to show on Desktop. You can even select drives to ignore so that Desktop Media doesn't create their shortcuts on Desktop.
Download Link
2. Desk Drive:
Desk Drive is another similar software which does the same job. It adds a desktop icon pointing to the drive automatically. Remove the media and the shortcut goes away.
You can access its settings using its system tray icon as usual.
Similar to Desktop Media, you can select which drives shortcuts you want to show and which you want to hide.
Download Link
Download Link (64-bit)

Download FREE Image Resizer Powertoy Clone for Windows XP, Vista and 7

"Image Resizer Powertoy Clone" is a free tool to resize one or more images at a time. It has been created after inspiring from Microsoft's official Image Resizer Powertoy for Windows XP. Since there is no official Image Resizer powertoy for Windows Vista, 7 and all 64-bit Windows OS, "BriceLambson" @ CodePlex decided to create one.
According to Brice, this clone was created to extend support to non-XP and 64-bit versions of Windows (including Windows 7 & Vista).
Using this tool is very simple. Simply right-click on the image(s) which you want to resize and select "Resize Pictures" option.
Image_Resizer_Powertoy_Clone_2.png
It'll ask you to select the new size from the pre-defined size list. You can also define a custom size.
Image_Resizer_Powertoy_Clone.png
Once decided, click on OK button and your image(s) will be resized.
You can download it using following link:
Download Image Resizer Powertoy Clone

How to Clear / Remove Unwanted Items from “Hide Inactive Icons” Customization Box History in Notification Area (System Tray) of Windows XP, Vista and 7

Recently an AskVG reader "Marcus Giardino" sent us an email about following problem:
In the NOTIFICATION AREA ICONS list located in the taskbar, there are list of programs that you can hide or show. When you uninstall a program, the icon for that program remains. How do I remove icons for uninstalled programs from this list?
Actually that's true. Windows doesn't remove uninstalled program icon from "Hide Inactive Icons" list automatically and sometimes it becomes annoying.
If you doesn't know about "Hide Inactive Icons" feature, lets provide some details about it.
Have you ever noticed the small arrow present near System Tray icons in Windows Taskbar? Following are 3 screenshots of Windows XP, Vista and 7 Taskbars:
Windows XP:
Hidden_Inactive_Icons_Win_XP.png
Windows Vista:
Hidden_Inactive_Icons_Win_Vista.png
Windows 7:
Hidden_Inactive_Icons_Win_7.png
This arrow is used to hide inactive icons and once you click on the arrow, it shows all icons for a few seconds.
You can enable/disable this feature using Taskbar Properties. You can also customize which icons should be always visible or hidden:
Windows XP "Hide Inactive Icons" Customization Box:
Notification_Area_Past_Icons_Win_XP.png
Windows Vista "Hide Inactive Icons" Customization Box:
Notification_Area_Past_Icons_Win_Vi.png
Windows 7 "Hide Inactive Icons" Customization Box:
Notification_Area_Past_Icons_Win7.png
As you can see in above 3 screenshots, Windows shows all system tray icons in the list and you can customize them according to your requirements.
In the last screenshot, "oldmcdonald.exe" program has been removed from the system but its icon is still visible in the list.
So today in this tutorial, we are going to share a small registry trick to CLEAR "Hide Inactive Icons" history list which will help in removing those unwanted past items from the customization box.
So here we go:
1. Type regedit in RUN dialog box and press Enter. It'll open Registry Editor.
2. Now goto following key:
For Windows XP:
HKEY_CURRENT_USER\Software\Microsoft\Windows\CurrentVersion\Explorer\TrayNotify
For Windows Vista and 7:
HKEY_CURRENT_USER\Software\Classes\Local Settings\Software\Microsoft\Windows\CurrentVersion\TrayNotify
3. In right-side pane, you'll see following 2 Binary values:
  • IconStreams
  • PastIconsStream
Windows XP:
Remove_Notification_Area_Icons_Hist.png
Windows Vista and 7:
Remove_Notification_Area_Icons_H-1.png
4. Delete both of them and log off or restart your system. It'll clear the "Hide Inactive Icons" history and all those unwanted icons from uninstalled programs will be removed from the list.
PS: If you want ready-made registry scripts to do the task automatically, download following ZIP file, extract it and run the extracted REG file. it'll ask for confirmation, accept it:
Download Registry Script

Add Control Panel, Task Manager, Windows Update and Other Useful Shortcuts with Icons in My Computer Context Menu

Control Panel, Task Manager, Device Manager are a few system applications which we use frequently in our daily computer tasks. Wouldn't it be great if we can access them quickly by right-click on My Computer icon on Desktop? Today we are going to share a registry script which will add following shortcuts in My Computer context menu:
  • Programs (Add/Remove Programs)
  • Run Cleanup on this system
  • Control Panel
  • Device Manager
  • Event Viewer
  • Manage
  • MSConfig
  • Registry Editor
  • Services
  • Task Manager
  • Windows Update
My_Computer_Context_Menu_Shortcuts_.png
Just download following ZIP file, extract it and run desired REG file. It'll ask for confirmation, accept it:
Download Registry Script
It works in Windows XP, Vista and 7.
Thanks to AskVG Readers "tlm" and cclloyd9785 for sharing them...

Download SevenVG Black RTM Theme for Windows XP

If you are facing menu cut-off problem in Start menu, then take a look at this link. Normal Thin Taskbar version - SevenVG Black RTM Theme with Normal Taskbar
After getting huge demand for a Black version of my recently released theme "SevenVG", I'm glad to announce the release of "SevenVG Black RTM" theme.
"SevenVG Black RTM" theme provides the same Windows 7 feeling in XP, at the same time it makes the people happy who love dark themes.
Following is a preview of this new theme:

You can download it using following link:
Download Link
More Info
How to Use:
1. Once you download the ZIP file, extract it. You'll get a folder "SevenVG Black RTM Theme for Windows XP by Vishal Gupta".
2. In this folder, you'll get 5 more folders:
  • Extra Common Tasks (This folder contains 2 extra shell styles: Bottom and Left dark blue.)
  • Fonts (This folder contains Segoe UI fonts required for the theme. Run Fonts.exe file to install them.)
  • Iconized Taskbar Hack (This folder contains registry script to enable Iconized taskbar in Windows XP.)
  • Styler Toolbar (This folder contains "Styler" setup file and "SevenVG RTM" Styler skin. You can apply it to get Windows 7 look-like commandbar in Windows XP Explorer.) To know more about Styler and how to use it, visit this link.
  • Theme (This folder contains the main theme. Run Theme.exe file to install it.)
3. Run "Theme.exe" file present in "Theme" folder and apply the theme using Desktop Properties.
4. Also make sure you have patched the "uxtheme.dll" file to be able to use 3rd party themes in Windows. If its not patched yet, download and run UXtheme Patcher using following link:
How to Install & Use?

Get Windows 7′s Advanced “Windows Update” in Windows 2000, XP, Vista, Server 2003 and 2008

Good news for Windows 2000, XP, Vista, Server 2003 and 2008 users. Microsoft has released an updated "Windows Update Agent" for all these OS which brings the new advanced Windows 7's "Windows Update" feature to these older Windows OS. Following is a preview of Windows 7's "Windows Update" window:
Windows_7_Update.png
You'll get a similar interface in Windows Vista and Server 2008 after installing this new update but remember Windows 2000, XP and Server 2003 users will not get this new interface, they'll only find some performance improvements as mentioned below.
This updated Windows Update Agent brings following new advanced features:
  • Improved scan times for Windows updates
  • Improved user interface for Windows Vista-based and Windows Server 2008-based computers that are running Windows Update
  • More visible and detailed description of updates
  • Improvements in how users are notified about service packs
You can download the new "Windows Update Agent" using following links:
Download Link (32-bit or x86)
Download Link (64-bit or x64)
Download Link (Itanium)

Download SevenVG RTM Theme with Normal Thin Taskbar for Windows X

If you are facing menu cut-off problem in Start menu, then take a look at this link.
After getting lots of requests to make a Normal Taskbar version of my recently released theme "SevenVG RTM" for Windows XP, today I'm glad to announce my new theme "SevenVG RTM with Normal Taskbar".
This theme doesn't contain new Windows 7 Superbar (Big Taskbar). So if you are not a fan of Superbar, this theme will definitely please you.

You can download the theme using following link:
Download SevenVG RTM Theme with Normal Taskbar

Alternative Link
How to Use:
1. Once you download the ZIP file, extract it. You'll get a folder "SevenVG RTM Theme with Normal Taskbar for Windows XP by Vishal Gupta".
2. In this folder, you'll get 5 more folders:
  • Extra Common Tasks (This folder contains 2 extra shell styles: Bottom and Left dark blue.)
  • Fonts (This folder contains Segoe UI fonts required for the theme. Run Fonts.exe file to install them.)
  • Iconized Taskbar Hack (This folder contains registry script to enable Iconized taskbar in Windows XP.)
  • Styler Toolbar (This folder contains "Styler" setup file and "SevenVG RTM" Styler skin. You can apply it to get Windows 7 look-like commandbar in Windows XP Explorer.) To know more about Styler and how to use it, visit this link.
  • Theme (This folder contains the main theme. Run Theme.exe file to install it.)
3. Run "Theme.exe" file present in "Theme" folder and apply the theme using Desktop Properties.
4. Also make sure you have patched the "uxtheme.dll" file to be able to use 3rd party themes in Windows. If its not patched yet, download and run UXtheme Patcher using following link:
How to Install & Use?

Download SevenVG Black RTM Theme with Normal Thin Taskbar for Windows XP

If you are facing menu cut-off problem in Start menu, then take a look at this link.
Recently I released "SevenVG Black RTM" theme for Windows XP which is a Black version of my "SevenVG RTM" theme.
Lots of people requested for a Normal Taskbar (Thin Taskbar) version of this theme and I'm glad to announce that "SevenVG Black RTM with Normal Taskbar" is available to download now.

You can download it using following link:
Download Link
More Info
How to Use:
1. Once you download the ZIP file, extract it. You'll get a folder "SevenVG Black RTM Theme with Normal Taskbar for Windows XP".
2. In this folder, you'll get 5 more folders:
  • Extra Common Tasks (This folder contains 2 extra shell styles: Bottom and Left dark blue.)
  • Fonts (This folder contains Segoe UI fonts required for the theme. Run Fonts.exe file to install them.)
  • Iconized Taskbar Hack (This folder contains registry script to enable Iconized taskbar in Windows XP.)
  • Styler Toolbar (This folder contains "Styler" setup file and "SevenVG RTM" Styler skin. You can apply it to get Windows 7 look-like commandbar in Windows XP Explorer.) To know more about Styler and how to use it, visit this link.
  • Theme (This folder contains the main theme. Run Theme.exe file to install it.)
3. Run "Theme.exe" file present in "Theme" folder and apply the theme using Desktop Properties.
4. Also make sure you have patched the "uxtheme.dll" file to be able to use 3rd party themes in Windows. If its not patched yet, download and run UXtheme Patcher using following link:
How to Install & Use?

TransTaskbar: Get Transparent Taskbar and Start Menu in Windows XP, Vista and 7

"TransTaskbar" is a portable, small and free application which can make Windows Taskbar and Startmenu transparent. It might become useful if you are using Windows XP and want to get some transparency for eye candy effects or if you are using Windows Vista or 7 but can't enjoy Aero interface because your Graphics card is not capable to run it. It can be used in Windows XP, Vista and 7 and works very well without any problem.

The utility has been created by our friend "Solo-Dev" @ DA. You can download it using following link:
Download Link
Extract the downloaded ZIP file and you'll get 2 files in it: TTB.exe and TTB-UI.exe
You'll need "TTB-UI.exe" file mostly. Run it and drag the slider to your desired value and click on "Apply" button. It'll immediately make the Taskbar and Startmenu transparent.
TTB-UI.exe is a GUI application and it doesn't allow to set the transparency below 25 and here comes the turn of TTB.exe which a command-line version of this application.
You can open a Command Prompt window and use TTB.exe in following format:
TTB transparency_value
For example, if you want to set transparency to 10, use following command:
TTB 10
Its a good utility for eye candy lovers.

Download SevenVG Icon Pack for “IconTweaker” NOW


This icon pack will make your Windows XP icons look-like Windows 7.

You can download it using following link:
Download SevenVG IconTweaker Pack
More Info
After downloading the file, extract it and you'll get a folder containing the Icon Pack. You'll need "IconTweaker" to apply this icon pack which is free and included in the ZIP file.
First install "IconTweaker", then double-click on "SevenVG Icon Theme.itt" file. It'll open IconTweaker window, click on "Apply" button to apply the new icons.

Disk2vhd: New Utility to Create VHD Versions of Physical Disks

"Disk2vhd" is a new utility released by Sysinternals team at Microsoft which allows you to create VHD versions of physical disks. If you are not aware of these technical terms, lets help you in understanding them. VHD refers to "Virtual Hard Disk" which is a file format used in Microsoft virtual machines. So by using "Disk2vhd" you can create VHD versions of your HDD which can be used in Microsoft Virtual PC or Microsoft Hyper-V virtual machines (VMs).
Disk2VHD.png
Disk2vhd supports Windows XP SP2 and higher including 64-bit editions.
You can download it using following link:
Download Link

Transform Windows XP into Windows 7 without using Customization Pack

NOTE 1: If you want to download all BITMAPs, AVIs and other files mentioned in this tutorial in a single pack, you can download it using this link.
NOTE 2: Please create a Restore point using "System Restore" before applying anything mentioned in this tutorial so that you can restore your system back to default if you don't like the changes.
Also take a backup of system files before modifying them, so that you can restore them if anything goes wrong or you don't like the new change.
NOTE 3: If you are facing problems while saving a file after editing in resource hacker, then make sure you have disabled WFP (Windows File Protection) service using "WFP Patcher" or use "Replacer" to replace the file. Both utilities can be found in our "Download" section.
Also if you are getting error "Can't create file...", that means you have edited and saved the same file in past and there is a backup file which need to be deleted before saving this file again. Go to the folder containing this file and you'll see a similar file having "_original" in its name. Delete it and try to save the file in resource hacker.
Windows 7 provides lots of new features along with a newly designed interface. It looks very similar to Windows Vista but there are many GUI changes like redesigned taskbar, Explorer, new boot screen and login screen, etc.
If you are still using Windows XP but want to enjoy the new Windows 7 look, then this tutorial will definitely help you.
After following this tutorial, you'll get the same Windows 7 look in your Windows XP. Following is a list of things which are going to change after following this tutorial:
  • Windows Theme or Visual Style
  • Icons
  • Boot Screen
  • Login Screen or Welcome Screen
  • Cursors
  • Taskbar
  • Wallpaper
  • Sidebar
  • Progress Dialog Box
  • Shutdown / Log off Dialog Box
  • About Windows Box
  • System Properties Dialog Box
  • Volume Control Window
  • Extras like "Aero Shake", "Aero Snap", "Aero Peek", "Calculator" and "Paint"
  • A Few Other Mods...
So here we start our transformation tour:
1. Windows Theme or Visual Style:
Windows 7 provides a new refreshing look which includes redesigned taskbar and start menu, Windows Explorer and a few other small changes.
You can get the same look in Windows XP by using following theme:

Download SevenVG RTM Theme for Windows XP
If you want a Black version, then you can get it using following link:

Download SevenVG Black RTM Theme for Windows XP
If you don't like the new Windows 7 Superbar, then you can download Normal Taskbar versions of these themes as well:
Download SevenVG RTM Theme with Normal Taskbar for Windows XP
Download SevenVG Black RTM Theme with Normal Taskbar for Windows XP
You can also use an excellent

Get Transparent Context Menus in Windows XP, Vista and 7

Recently we blogged about "TransTaskbar" which can make Windows Taskbar and Start menu transparent. Today we are going to share another similar utility. "TCM (TransConMenu)" is a very small and portable utility created by the same person "Solo-Dev" @ DA which makes Window menus and context menus (menu which is shown when you right-click on something) transparent.

It works in Windows XP, Vista and 7.
You can also adjust the transparency level by clicking on its system tray icon. Simply drag the slider and click on Apply button.
You can download it using following link:
Download Link

WinShake: Get Windows 7 “Aero Shake”, “Aero Peek” and “Show Desktop” Features in XP and Vista

"WinShake" is a very small program which can bring Windows 7's "Aero Shake", "Aero Peek" and "Show Desktop" features to Windows 98, Me, 2000, XP, 2003 and Vista. Its size is 600KB and it doesn't take much resources. The new version 2.02 finally adds true Windows 7 Aero Taskbar Peek, making it possible to Peek at a window, just by hovering over its Taskbar Button. You can even Peek at minimized windows. This new function, plus all the other ones, can now also be used with your mouse.
Features List:
Feature = New (Windows 7 Aero) Taskbar Peek function.
Feature = Now you can Shake a window by clicking the MMB (Middle Mouse Button) on its Title Bar.
Feature = You can Peek by clicking the MMB at (the right of) the clock in the Taskbar.
Feature = You can Show Desktop by double clicking the MMB at (the right of) the clock in the Taskbar (hold Shift to Reset).
Feature = And you can use PeekTop by clicking the MMB on the X-Button in the Title Bar of a window.
Feature = When peeking through all windows, you can make a window reappear by clicking the MMB on its border, or on the ToolTip showing its Title.
Feature = Added HotKeys for Show, Shake, Reset, Peek and PeekTop.
Bug fix = Solved the problem that under rare circumstances an active "Normal" window would become "Always-On-Top" after having used Shake or Show Desktop.
Bug fix = Solved a visual glitch when switching between Peek and PeekTop with "Always-On-Top" windows present.
Improve = The Taskbar Peek function even shows SnapShots of programs that don’t follow the default Taskbar behavior (older versions of Adobe Reader).
This utility has been created by "Fred" and here is what the developer says about this program:
The Taskbar Peek function is similar to the true Windows 7 Aero Peek function, making it possible to Peek at a window, just by hovering over its Taskbar Button: when clicking the Middle Mouse Button on one of the program buttons, all other windows are Peeked, leaving only the desired one to look at. You can use this to quickly find a window in real size, making it easier to see the differences between two windows. Or maybe you just want to take a Peek at one without actually switching to it.
By hovering over a Grouped Taskbar Button, its menu automatically opens, so you can Peek at these windows too. Even minimized windows can be Peeked at!... As long as they’ve been open long enough for WinShake Control to take a SnapShot of them, that SnapShot is being shown in real size on the position where the window was when the picture was taken. And when you click on a SnapShot, the actual window is restored.
This Taskbar Peek function however is not completely free to use anymore... I hope you will find it worth a little bit!... :) But first you can try it of course, so...
Enjoy the program!
You can download it using following link:
Download Link

Microsoft Releases “Patch Registration Cleanup Tool” to Fix Errors While Updating “Windows Installer” Based Products

Many times when you try to update a product which was installed using Windows Installer, you might receive errors and the update process gets failed. Actually "Windows Installer" uses the registry to record information about updates installed for each Windows Installer-based product. These registry keys help identify the state of each update: registered, applied, superseded, or obsoleted. Information about installed updates is stored across several registry keys and values. To allow for the product to be in a serviceable state in which it can be repaired, updated, or uninstalled, it is critical for the data in these registry keys to be synchronized. When the data in these registry keys is no longer synchronized, maintenance mode operations cannot be performed on the product .msi file.
The "Patch Registration Cleanup Tool" helps resolve some issues that are related to invalid or corrupted update registration. This tool lets you bring the product back to a known state so that you can reinstall updates.
This tool can be used in Windows 2000, XP, Server 2003, Vista, Server 2008 and 7.
You can download it using following link:
Download Link

Texturize Windows XP, Vista and 7 Taskbar using Taskbar Texturizer

Here is another awesome tool created by our friend "Solo-Dev" @ DA. "Taskbar Texturizer" is a small tool which can add various textures to your Windows Taskbar to make it more stylish.
Its portable, so you don't need to install it. It can also be set to run at windows start up, along with auto-applying the last skin that was chosen.
The start menu also becomes transparent with the slider.
It comes with 10+ textures to choose from. It works in Windows XP, Vista and 7.
You can download it using following link:
Download Link

Get Windows 7′s “Desktop Background SlideShow” Feature in XP and Vista Using Microsoft’s Official “Winter Fun Wallpaper Changer” Powertoy

Who said "Desktop Background SlideShow" is a new feature in Windows 7? Did you know Microsoft once released a similar powertoy for Windows XP? "Desktop Background SlideShow" is a feature present in Windows 7 which allows you to set more than one wallpaper for your Desktop. Windows automatically cycles through the selected wallpapers after a fixed period of time. You can set the wallpapers and time period using Desktop Personalization menu.
If you want a similar feature for Windows XP or Vista, here is something interesting for you! In 2003, Microsoft introduced "Winter Fun Packs 2003" for Windows XP which included following components:
  • Windows Media Player 9 Series
  • Windows Movie Maker 2
  • Digital Photography
  • Games
Windows_XP_Winter_Fun_Pack_2003.png
The "Digital Photography" section contained following components:
  • Winter Fun Photo Screensaver
  • Winter Fun Wallpaper Changer
  • Holiday Greeting Card Templates
  • Photo Story 2 LE
Windows_XP_Winter_Fun_Pack_2003_2.png
The important thing which we need is "Winter Fun Wallpaper Changer" which can bring Windows 7's "Desktop Background SlideShow" feature to Windows XP and Vista.
"Winter Fun Wallpaper Changer" allows you to set any desired folder for Desktop background SlideShow. Once you select the folder, it starts cycling through all the wallpapers present in that folder and its sub-folders.
It also allows you to set any particular single wallpaper for your Desktop.
The minimum time interval can be set to 15 minutes and can be increased upto 1 week.
Winter_Fun_Wallpaper_Changer.png
You can download "Winter Fun Packs 2003" using following link:
Download "Winter Fun Packs 2003"
Simply install the pack in Windows XP or Vista and launch "Winter Fun Packs 2003" from startmenu. Select "Digital Photography" from the list and there you can launch "Winter Fun Wallpaper Changer".
UPDATE: You can also download the "Winter Fun Wallpaper Changer" powertoy separately using following link:
Download "Winter Fun Wallpaper Changer" Powertoy (Requires Genuine Windows Validation check) Thanks "Harry".
Direct Download Link Thanks "Geo".
It sits in system tray and allows you to change various settings using context menu.
TIP: If you copy the main "WinterWalltoy.exe" file from "%programfiles%\Windows XP Fun Pack\Winter 2003\WinterPowerToy" folder to any other system, it'll run without any problem and you would not need to install the whole Winter Fun Pack.

How to Disable Autorun Functionality in Windows Using Registry Editor?

Whenever you insert a USB drive, CD/DVD, etc into your system, Windows automatically launches an Autorun dialog box which allows you to select an action from the given list. You can browse the content, play media files, etc using Autorun dialog box. Sometimes you might find the Autorun functionality annoying and might want to disable it permanently. Today in this tutorial, we are going to share a small registry method to disable Autorun functionality in Windows.
This method works in almost all Windows versions including XP, Vista and 7.
1. Type regedit in RUN or Startmenu searchbox and press Enter. It'll open Registry Editor.
2. Go to following key:
HKEY_CURRENT_USER\Software\Microsoft\Windows\CurrentVersion\Policies\Explorer
If the above key doesn't exist, create it.
3. In right-side pane, create a new DWORD value NoDriveTypeAutoRun and set its value to any of following according to your requirements:
FF - To disable AutoRun on all drives
20 - To disable AutoRun on CD-ROM drives
4 - To disable AutoRun on removable drives
8 - To disable AutoRun on fixed drives
10 - To disable AutoRun on network drives
40 - To disable AutoRun on RAM disks
1 - To disable AutoRun on unknown drives
Disable_Autorun_Functionality.png
4. If you want to disable Autorun on a combination of drives, you'll need to calculate sum of the values. For example, if you want to disable Autorun on CD-ROM drives and removable drives, you'll need to set the value to 20+4=24.
5. If you want to restore the Autorun functionality, simply delete the NoDriveTypeAutoRun DWORD value created in Step 3 Or you can set the default value which is given below:
Windows 2000: 95
Windows XP: 91
Windows Server 2003: 95
Windows Vista, Server 2008 and 7: 91
6. If you want to disable Autorun functionality for all users in your system, use the "HKEY_LOCAL_MACHINE" instead of "HKEY_CURRENT_USER" mentioned in Step 2.
PS: If you are not very familiar with Registry and want a ready-made registry script to do the task automatically, simply download following ZIP file, extract it and run the desired REG file. It'll ask for confirmation, accept it:
Download Registry Script

Stardock LogonStudio: Change Windows XP, Vista and 7 Login Screen

Stardock LogonStudio allows Windows XP, Vista and 7 users to edit, change, and apply new logon screens. LogonStudio comes built with a visual editor to make it easy to create your own logons which can then be uploaded to websites to be used by others users.
System Requirements:
  • Windows 7, Vista or XP
  • Minimum screen resolution: 1024 width and 768 height
  • 10MB free drive space
  • 512MB RAM
Download Link

Microsoft Launched “Automated Troubleshooting Services” to Fix Common Maintenance Problems for Windows XP and Vista

icrosoft has launched online "Automated Troubleshooting Services" to automatically detect and fix common maintenance problems such as broken desktop shortcuts, unused icons, disk volume errors, and incorrect system time display. It fixes following issues:
Problems with desktop shortcuts and icons
  • Shortcuts on the desktop don't work or are broken
  • Desktop icons are broken or have not been used in 3 months
  • Startup items don't work or are broken
System maintenance tasks
  • Free up disk space by repairing disk volume errors such as bad sectors, lost clusters, cross-linked files and directory errors
  • Free up disk space by removing error reports and troubleshooting history older than 1 month
  • Set the correct system time and synchronize system clock with the time server
You receive following errors
  • Windows update error 0x80072F8F
  • The item that this shortcut refers to has been deleted
Microsoft Automated Troubleshooting Services scans your computer and detects the root causes of common problems, then automatically fixes the problems that it finds, and offers additional resources if the problem isn't fixed.
Run Microsoft Automated Troubleshooting Services

Add “Hide” and “Unhide” Options in File / Folder Context Menus in Windows XP, Vista and 7

Almost all computer users hide their important and private files/folders regularly to prevent unwanted access. To hide a file/folder, you need to enter its Properties and then select the "Hidden" option. Wouldn't it be great if you get a "Hide" option in all Files and Folders context menu so that you just need to right-click on a file/folder and select "Hide" option to make it hidden.
Hide_Unhide_File_Context_Menu_Optio.png Hide_Unhide_Folder_Context_Menu_Opt.png
Today in this tutorial, we'll tell you how to add "Hide" and "Unhide" options in file/folder context menu as shown in the above screenshots.
To add "Hide File" option in file context menu:
Download following ZIP file, extract it and run extracted .REG file. It'll add "Hide File" option in all files context menu:
Download Registry Script
To add "Unhide File" option in file context menu:
Download following ZIP file, extract it and run extracted .REG file. It'll add "Unhide File" option in all files context menu:
Download Registry Script
To add "Hide Folder" option in folder context menu:
Download following ZIP file, extract it and run extracted .REG file. It'll add "Hide Folder" option in all folders context menu:
Download Registry Script
To add "Unhide Folder" option in folder context menu:
Download following ZIP file, extract it and run extracted .REG file. It'll add "Unhide Folder" option in all folders context menu:
Download Registry Script
NOTE: Each ZIP file also contains an Uninstall.reg file which can be used to remove the Hide/Unhide options.

Acer Gridvista: Get Windows 7 “Aero Snap” Feature in XP and Vista

Today we are sharing another freeware which is called "Acer Gridvista". This application makes more effective use of large monitors by dividing them into sections where you can place your windows. Acer_Gridvista.jpg
Acer Gridvista divides your screen into two, three or four sections in which you can drag & drop windows. The windows will then be automatically resized. You can also set a window to be always on top or semi-transparent.
Download Link
Thanks to our reader "Brink" for this info...

[Fix] Installation of Microsoft Office 2010 Requires MSXML Version 6.10.1129.0

When you try to install Microsoft Office 2010 in Windows XP, you might get following error message:
Setup is unable to proceed due to the following error(s):
The installation of Microsoft Office 2010 requires that MSXML version 6.10.1129.0 should be installed on your computer. Install the component and re-run the setup. Correct the issue(s) and re-run the setup.
To fix the issue, you can follow any of following solutions:
Solution 1:
Download and install Windows XP SP3 from here. SP3 contains MSXML, so it'll fix your problem.
Solution 2:
If you can't download and install SP3, you can manually download and install MSXML using this link.
Solution 3:
If the above solutions don't work for you, do as following:
1. Type regedit in RUN or start menu search box and press Enter. It'll open Registry Editor.
2. Now go to following key:
HKEY_CLASSES_ROOT\TypeLib\{F5078F18-C551-11D3-89B9-0000F81FE221}\6.0\0\win32
3. Right-click on win32 key and select Permissions.
4. Now select your username and provide Full Control to it.
5. After that in right-side pane, change value of (Default) to following:
C:\Windows\System32\msxml6.dll
NOTE: Here C: is system drive where Windows is installed in your system. If you have installed Windows in any other drive, change C: to that drive letter.
After following any of above mentioned solutions, re-run Office 2010 setup and now it should work without any problem.

KB980182: Out-of-Band Patch for Internet Explorer

Microsoft has released an out-of-band patch for Internet Explorer which addresses the vulnerability discussed in Microsoft Security Bulletin MS10-018. This security update resolves nine privately reported vulnerabilities and one publicly disclosed vulnerability in Internet Explorer. The most severe vulnerabilities could allow remote code execution if a user views a specially crafted Web page using Internet Explorer. Users whose accounts are configured to have fewer user rights on the system could be less impacted than users who operate with administrative user rights.
This security update is rated Critical for all supported releases of Internet Explorer: Internet Explorer 5.01, Internet Explorer 6 Service Pack 1, Internet Explorer 6 on Windows clients, Internet Explorer 7, and Internet Explorer 8 on Windows clients. For Internet Explorer 6 on Windows servers, this update is rated Important. And for Internet Explorer 8 on Windows servers, this update is rated Moderate.
The majority of customers have automatic updating enabled and will not need to take any action because this security update will be downloaded and installed automatically. Customers who have not enabled automatic updating need to check for updates and install this update manually.
You can also download and install this update manually using the links given in following Microsoft Security Bulletin:
Download Link

AquaSnap: Get Windows 7′s Aero Snap and Aero Shake Features in Windows XP and Vista

AquaSnap greatly enhances the way you can arrange windows on your Desktop. It gives you the possibility to snap windows to the edges or to the corners of the desktop simply by dragging and dropping them where you want. AquaSnap is a great replacement for the Aero Snap and Aero Shake features of Windows 7 and is compatible with every Windows versions.
AquaSnap makes the window management much more ergonomic. Drag a window to the border of your desktop, and this window will be snapped and resized to fit one half of the screen. Drag this window to a corner, it will be snapped to fit one quarter. Shake a window, and this window will stay always on top.
AquaSnap.png
Features List:
  • Can resize windows to half screen and quarter screen.
  • Multiple monitors support.
  • Works with child windows of Multiple Document Interface (MDI).
  • Skinnable interface.
  • Multilingual GUI (English and French).
Download Link

ViCon Remastered: Get Windows Vista and 7′s Desktop Icon Mouse Hover Effect in Windows XP

Vista_7_Icon_Mouse_Hover_Rectangle.png
In Windows Vista and 7 whenever you hover your mouse cursor over a Desktop icon, it shows a cool transparent rectangle over the icon. This kind of behavior is not found in XP but many XP users want this awesome effect in their OS.
Today we are going to share an awesome free tool which brings this cool mouse hover effect to XP.
"ViCon Remastered" is an excellent tool created by "MixenDixon" @ DA which allows you to put your desired icons at Desktop and provides the Vista and 7's mouse hover effect for them.
You just need to run the tool and it shows following interface:
ViCon_Remastered.png
You can also bring the above window by right-clicking on its System tray icon and select Settings option.
Four ready-made Desktop icons are already given to choose: Computer, Documents, Network and Recycle Bin which are the default Windows icons.
You can simply click on their respective buttons and then OK button to add them on Desktop. Once the icons are created at Desktop, all the icons will have the cool mouse hover effect just like Windows Vista and 7:
Vista_7_Icon_Hover_Effect_XP.png
If you don't want to show the Windows default Desktop icons which don't have mouse hover rectangle, you can disable them by right-clicking on Desktop and uncheck "Arrange Icons By -> Show Desktop Icons" option.
Disable_Show_Desktop_Icons.png
If you want, you can add more desired icons at Desktop by clicking on the "Add" button in ViCon Settings window and select the path of your desired program's EXE file.
Its a great free tool for XP users. You can download it using following link:
Download Link

Visual Subst: Automatically Create Virtual Drives for Your Desired Folder in Windows Explorer

We have posted about the "subst" DOS command in past which allows you to create a virtual drive for your desired folder in Windows Explorer which helps in quick and easy access to your frequently used folders. Create a Virtual Drive for Your Desired Folder in My Computer Using Subst Command
Today we are going to share a small and portable utility "Visual Subst" which helps in creating these virtual drives quickly and easily by providing a GUI instead of manually creating the drives using the DOS command.
Visual Subst is a small tool that allows you to associate the most accessed directories with virtual drives. It uses the same API similar to the console 'subst' utility, but makes it easier to create and remove virtual drives in a GUI way.
Visual_Subst.png
It can be used in almost all Windows versions including XP, Vista and 7.
Visual Subst does not require installation. It is fully portable because all settings are stored into a .INI file. However there is a simple installer provided which will help you to create some program shortcuts.
Download Link (Portable Zip File)
Download Link (Setup EXE File)

#
### ###