Friends

This is default featured post 1 title

Go to Blogger edit html and find these sentences.Now replace these sentences with your own descriptions.This theme is Bloggerized by Lasantha Bandara - Premiumbloggertemplates.com.

This is default featured post 2 title

Go to Blogger edit html and find these sentences.Now replace these sentences with your own descriptions.This theme is Bloggerized by Lasantha Bandara - Premiumbloggertemplates.com.

This is default featured post 3 title

Go to Blogger edit html and find these sentences.Now replace these sentences with your own descriptions.This theme is Bloggerized by Lasantha Bandara - Premiumbloggertemplates.com.

This is default featured post 4 title

Go to Blogger edit html and find these sentences.Now replace these sentences with your own descriptions.This theme is Bloggerized by Lasantha Bandara - Premiumbloggertemplates.com.

This is default featured post 5 title

Go to Blogger edit html and find these sentences.Now replace these sentences with your own descriptions.This theme is Bloggerized by Lasantha Bandara - Premiumbloggertemplates.com.

Monday, November 7, 2011

PHP Arrays, Functions and Classes

This series explains some of the most important parts of PHP application development: arrays, functions and classes. Required file for the tutorial: dwc.zip

Part 1 - Set Up

Set Up
Setup the database and unpack the files
Time: 04:58

Part 2 - Arrays

Don’t be scared. Arrays are soft and cuddly
Time: 18:39

Part 3 - Functions

Functions explained. Frankenstein used these to create his monster although maybe not in PHP
Time: 41:31

Part 4 - Classes

Who's top of the Class? Introduction to OOP, Object Orientated Programming.
Time: 23:36

Dynamic file uploads with PHP

A basic primer in uploading files from your users to your server. A very brief but easily understandable example explained from the begining. Required file for the tutorial: upload_file.zip

Launch Video Tutorial

PHP Includes

But you said 'use Templates'! In a previous tutorial I have covered how to use Dreamweaver's inbuilt 'Template System' to create a master page or .dwt file which all of your other pages are based on. You make a change in the template page (where you don't have an 'editable region') and Dreamweaver will update all of the pages in your site.
This system is a great introduction to the concept of having a master page and can work really well on a site which may be 5 – 10 pages. Imagine though that your website is 100s of pages. Every time you make a change you are asking Dreamweaver to update all of the pages and then, if it doesn't crash your PC or Mac, you have to ftp them all back up to your webspace. This can get really boring, really quickly. If you have a basic grasp of what HTML code looks like and does (and yes, this does mean venturing past 'Design View') then give 'includes' a try.

What are PHP 'includes'?

PHP is a server-side scripting language and it can be used to create all kinds of database driven web applications. However, 'includes' are very simple to use indeed. The basic principle is that the page is viewed by the visitor selecting your URL. Before they even get to see the website the PHP in the page will 'call' another set of HTML from a different file and then include that HTML in the page when it opens.
So that is the logic. You can have the HTML, which makes up your menu for instance, in one file and then this can be 'called' into every other page which opens up using a simple piece of PHP code. If you need to change your menu, then you change the one file and all your pages change. Much like .dwt files but you only have to ftp the one file instead of all your 100s of pages.

How do I do it?

This is the basic code for an 'include' <?php include(); ?>
I would usually recommend having a folder of 'includes' for complicated sites as you may find yourself needing 'includes' for other PHP scripts such as security or a database connection in the future. It also makes good sense to me in terms of site structure. You have an 'images' folder for your images, a 'javascript' folder for your javascript and so on.
So you want to create your website menu as an 'include'. All you need to do is create your HTML menu as you would want it to appear in your page layout. I will use a simple unordered list menu for this demonstration. My menu will start out with four links.
<li><a href="index.php">Home</a></li>
<li><a href="about.php">About Us</a></li>
<li><a href="products.php">Products</a></li>
<li><a href="services.php">Services</a></li>

Now, instead of including this in the HTML of the page, I am going to create a new page called 'menu.php'. If you are using Dreamweaver you don't need any of the usual page structure items that it creates for you. Simply delete the doctype, head, body and html tags until you are left with a completely blank page. Much as you would have if you created a new 'Notepad' file. Then I simply create the menu structure in the 'menu.php' page and save it.
Last thing I need is to tell my pages to include the HTML for my menu wherever I want it. This means expanding on the basic code I showed you earlier.
<?php include("includes/menu.php"); ?>
Notice that the location of my 'menu.php' file is referenced between the brackets and in between quotation marks. As with an image link, it says that the file is in the 'includes' folder and then gives the name of the file.
I want my menu to be styled using CSS of course so I need to place the 'include' code within an unordered list tag. For example: <ul id="navigation"><?php include("includes/menu.php"); ?></ul>
When the page is viewed the actual HTML which is output looks like this: <ul id="navigation">
<li><a href="index.php">Home</a></li>
<li><a href="about.php">About Us</a></li>
<li><a href="products.php">Products</a></li>
<li><a href="services.php">Services</a></li>

If I decide that I want to add a fifth menu item, maybe a 'Contact Us' link then I simply add another list item to my 'menu.php' file so that the HTML output is: <ul id="navigation">
<li><a href="index.php">Home</a></li>
<li><a href="about.php">About Us</a></li>
<li><a href="products.php">Products</a></li>
<li><a href="services.php">Services</a></li>
<li><a href="contact.php">Contact Us<a/></li>
</ul>

Cautionary note

If you are using Dreamweaver and you create all of your links automatically then you need to watch out for the file paths. Although the 'menu.php' file is in the 'includes' folder it is actually being called into a page that is in your site root, so, one folder up. This means you must imagine that you are creating links in your root folder. It is very easy to end up with something that looks like this: <li><a href="../index.php">Home</a></li>
<li><a href="../about.php">About Us</a></li>
<li><a href="../products.php">Products</a></li>
<li><a href="../services.php">Services</a></li>
This won't work when the HTML is called because the links will be pointing towards the wrong place. The same goes for images as well!

Other uses

'Includes' can also be useful for other things and I have be known to use it to break down complicated site designs into more bitesize chunks. For instance large image galleries, such as Lightbox2 powered ones, can keep all of the images in one 'includes' file. This makes them more manageable and you may even consider letting your client loose on an 'include' or two as all they will need to do is update that single file by copying and pasting the Lightbox2 code.
Once you have a reasonable coding knowledge using PHP 'includes' should be a clean and simple way of updating 100s of pages from one single file.

Photoshop Cropping, the Non-Destructive Way

In this tutorial you will learn how to crop an object out of its surroundings in a non-destructive way. Non- destructive means without damaging the original picture by using the erase tool or having to duplicate the original picture a bunch of times. The pictures I am using is a hot air balloon, because it has both straight and curved lines, and the standard picture that comes with every PC within the "My Pictures" folder. Click here and here to download these pictures. (Picture can only be used in conjunction with this free tutorial anything else is a copyright violation.) 1. First open the picture and select the pen tool, select a color that is different than your picture. I usually like to use blue. Then right click on the balloon layer and select "Duplicate Layer" and delete the original Background layer. When a picture is brought into Photoshop it is brought in as a background layer and you can't manipulate a BG layer.
1 (52K) 2. With the pen tool selected start at the top and place a point where there seem to be the start of a main angle or a new line, try not to go crazy, will add more points in a bit. (For example, if you had a square every corner would be the beginning of a new line/angle.)
2 (92K) After you have about 3 points go over to you layers palate and change the Opacity for the shape layer to about 25 percent. This way you can see what you're doing. When you get back to where you started click on the very first point you made. A small circle will appear when your pen hovers over the first point before you click on it.
3. Now, zoom in to any page of the picture. Select the pen tool and find a spot that need to have an arch or needs more points. Hold down the "ctrl" button and click on the line. All the points that you have put in already should appear, if not "ctrl click" it again. Holding the "ctrl" button is a short cut for the "Direct Selection tool" You can also get to this by the tools palate or pressing A.
3 (66K) 4. Now, with just the pen tool click on the line where you want to add the point. Once you do that 3 dots will appear. The one in the middle is the point or anchor. The 2 to the sides are the arms that allow you to change the shape of the line. Hold down "ctrl" (or press A) and drag the anchor to the edge of the picture. If it does not fit properly play around with the arms until it does. Drag the arms up or down to change the arch and drag them in or out to change the length of the arch. (Note: you have to use the Direct Selection Tool to move points)
4 (70K) 5. Do this with the rest of the balloon until you have all of the points outlining the balloon. Don't worry about the inside of the basket where the arms are. You will see how to fix those later. Your outline should now look like this.
5 (86K) 6. Now, select the Move tool (keyboard shortcut V). Hold down the "ctrl" key and click on the outline layer of the balloon. In previous versions of Photoshop you could control click anywhere on the desired layer within the layers palate, but in PS2 you must control click on the picture or shape within the layers palate. (You will know you are doing it correctly when the white hand turns into a white hand with a dotted square box.) Once you click on the layer your outline will become a dotted outline just like when you use the marquee tool.
6 (87K) 7. Next select the layer that has the actual picture you want to crop so that it's highlighted in the layers palate. In this tutorial it's the "Background copy" layer. Then, at the top menu, go to "Layer" – "Layer Mask" – and select "Reveal Selection". Or you can just click the "Layer Mask" icon at the bottom of the layers palate. Your image should now be cropped and look like this.
7 (100K) 8. You can now turn off your "Shape" or the outline you made of the balloon. Now if you remember the basket had arms that came up and attached to the balloon and you could see the sky in between those arms. We are now going to fix that. Select the mask of your balloon layer, which is the black/white outline next to your balloon image. Then select the brush tool (keyboard shortcut B). Your colors turn to 100% black and white. If not you do not have the masked selected. Now, with the black selected use your brush to and draw over the area you want to disappear. It will work like an eraser.
8 (93K) 9. Using the color white will add the image back. Experiment, select the white color and drag your brush across the picture and watch how the image reappears. Or do it with the black color selected and scribble over the picture. This really helps when you are cropping out hard object like people and hair. Best of all it saves the picture and keeps you from having to duplicate the image a bunch of times, or make a bunch of layer and so on.
9 (111K) 10. Now you can add any background you want to your balloon image. I hope this tutorial was fun and informative.
10 (43K)

Using Dreamweaver and PHP to send form results in an email

The form is a primary way to get web interactivity and structured communication. Dreamweaver has a robust and superior implementation of HTML forms. Forms enable user not only to read information passively from the screen, but also to send information back. One of the more common questions is how to submit a form to send information in an e-mail. Using PHP, it's really very easy. Here we'll learn about processing forms to send e-mail using PHP.

Getting started with forms in Dreamweaver

I am using Dreamweaver MX 2004 but the options are almost same in the old and latest releases of Dreamweaver. We will be making a simple contact form and will deliver the results in an email using a PHP script.

Step 1: Create a form

We have created a simple form with four form fields as:
  • Name (text field)
  • Last name (text field)
  • Email address (text field)
  • Comments (textarea)
contactform (9K)

Step 2: PHP Script for processing the form results

We will use the PHP to send our form results through an email.
Copy and save this code in a file sendresults.php and set the following parameters the according to your requirements.
  • $subject (Subject of email sent to you)
  • $emailadd (Your email address. This is where the form information will be sent)
  • $url (Where to redirect after form is processed. )
  • $req (Makes all fields required. If set to '1' no field can not be empty. If set to '0' any or all fields can be empty.)
<?php
//--------------------------Set these paramaters--------------------------

// Subject of email sent to you.
$subject = 'Results from Contact form';

// Your email address. This is where the form information will be sent.
$emailadd = 'mail@rdsnetworks.net';

// Where to redirect after form is processed.
$url = 'http://www.rdsnetworks.net/confirmation.html';

// Makes all fields required. If set to '1' no field can not be empty. If set to '0' any or all fields can be empty.
$req = '0';

// --------------------------Do not edit below this line--------------------------
$text = "Results from form:\n\n";
$space = ' ';
$line = '
';
foreach ($_POST as $key => $value)
{
if ($req == '1')
{
if ($value == '')
{echo "$key is empty";die;}
}
$j = strlen($key);
if ($j >= 20)
{echo "Name of form element $key cannot be longer than 20 characters";die;}
$j = 20 - $j;
for ($i = 1; $i <= $j; $i++)
{$space .= ' ';}
$value = str_replace('\n', "$line", $value);
$conc = "{$key}:$space{$value}$line";
$text .= $conc;
$space = ' ';
}
mail($emailadd, $subject, $text, 'From: '.$emailadd.'');
echo '<META HTTP-EQUIV=Refresh CONTENT="0; URL='.$url.'">';
?>

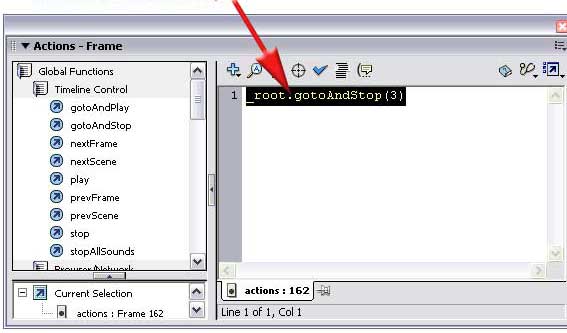
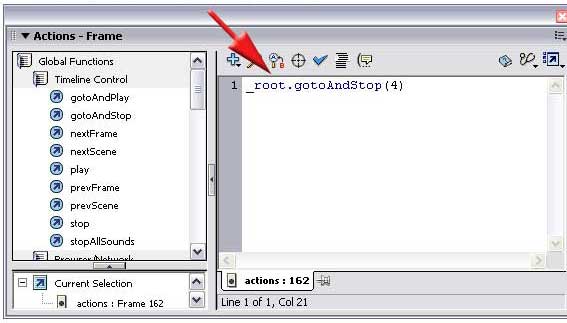
Step 3: Pointing your form to the PHP script to process it

Select the form and in form properties you will see the following attributes.
form-properties (8K) The Name attribute is very clear gives your form a name. We have given our form name as Contact form.
The Action attribute determines what should be done with the form content. Most commonly, action is set to a URL for running a specific web application or for sending email.
Here you will give the URL where you saved your sendresults.php file Example www.yourdomain.com/sendresults.php
The Method attribute tells the browser or the web server how to present the form contents to the application that will process the form. “POST” in the Method window indicates that the information in the form will be passed to the program processing the form as standard input. Give method=POST
Save your form and test it.

Points to remember:

  • In the form properties, Action=URL of your sendresults.php file and Method=POST
  • Editing the following parameters in sendresults.php file:
    $subject, $emailadd, $url, $req
  • Make sure your host supports PHP

Controlling movie files through Flash

1. Import your 3 movies files to your Library.
2. click next

you need to import all 3 movie files this way so your library looks like this

now create a new symbol and set this

then use the drawing tools to create a button

now create a new symbol and set this

drag your buttonShape onto the button canvas (see below) make sure you can see the buttonShape when you select Up Over Down and Hit . To do this make sure your buttonShape is visible in the up keyframe. Place your cursor in the over keyframe and press F6 on keyboard repeat until you can see buttonShape in all four states. (this is where you would define a shape for rollovers if you want)

close the button and now set this

you need to do this 3 times as you have 3 movies (movie1, movie2, movie3)
drag your embedded movie files into each movie clip from the library
now return to your main stage and configure the timeline as below

now select the first frame from the actions layer an press F9 on keyboard. In the actions window type stop()

in the movies layer add blank keyframes by pressing F6 at frames 2,3,4

now drag your movie clips (1,2,3) into keyframes (2,3,4) repectivly

place your cursor into buttons keyframe and drag your button onto the stage

select the button and in the properties and name the instance as button1 you can change the colour if you like by adjusting the color dropdown

drag the same button onto your stage again and name the instance button2. Do this also for button 3.

Now select the first button and press F9. write the following in the actions window

select the second button and do the same except write
on (press) {
gotAndStop(3);
}
do the same with button 3 and write
on (press) {
gotAndStop(4);
}
open your movie1 and add a Layer and call it Actions. Scroll to the end of the timeline and select the last keyframe and press F6 (which inserts an empty keyframe)

press F9 and insert the following

do the same in movie2 except write the following

now publish your movie controller to an .SWF

Installing PHP/MySQL/Apache with WAMP Server for Dreamweaver

The beginners guide for setting up a localhost server on PC (Vista/XP) for PHP and Database Development. This VTM will have you up and running in just 15 Minutes. Step by step guide by Neonfluxx of Dreamweaver Club. If your monitor resolution is lower than 1280x1024, please view this tutorial in browser Full Screen (F11)

Launch Video Tutorial

CSS Box Model

What is the box model? The basics of CSS positioning starts with understanding the CSS Box Model. Every HTML element in a document is a rectangular box as shown below.
2 (3K) Margins are always transparent. They seperate the box from surrounding elements. They do not contribute to the width of the box.
Borders come in various styles. They do not contribute to the width of a box.
Padding seperates the actual box content from the borders. They do not contribute to the width of the box.
Content is the portion in white in the above image. The width of the content is the width of the box.
So if we are to calculate the CSS Width of a box it would be
CSS Width = Content Width
Provided you use a valid doctype, most modern browsers understand the above box model. The exception to the rule is Internet Explorer 5 upto Internet Explorer 6. IE 6 and above get the box model right with a valid doctype.

Internet Explorer 5 Box Model

In Internet Explorer 5 border and margin contribute to the width of the box. Consider the following div
Code:
#example { width: 300px; border: 10px; padding: 15px; margin: 25px; } For the above CSS, the diagram below shows how a standard browser renders the box in comparision to IE 5
1 (7K) IE 5 considers the width 300px inclusive of border and padding, hence for IE 5,
IE Width = Left Border + Left Padding + Content Width + Right Padding + Right Border
OR
300px = 10px + 15px + Content Width + 15px + 10px
SO
Content Width = 300px - 10px - 15px - 15 px - 10 px = 250px
If we have to have a content width of 300px, then IE Width would be
IE Width = 10px + 15px + 300px + 15px + 10px = 350px. Our style should be
Code:
#example {
width: 350px;
border: 10px;
padding: 15px;
margin: 25px;
}
Now its time to combine the 2 widths and feed the correct browser the correct width
Code: <style>
#example {
width: 300px; /* for standards based browsers */
border: 10px;
padding: 15px;
margin: 25px;
} </style>
<!--[if IE 5]>
<style>
#example {
width: 350px; /* for IE 5 */
}
</style>
<![endif]-->

Centered content with CSS

One of the most asked questions in our forums is "How do I center my content?" By "centering" we mean keeping all the content centered in the browser viewing area even at different resolutions and even if a user re-sizes the page.
By using a CSS "wrapper" this is very easy to accomplish.
There are basically 2 methods - a "liquid" or "fluid" method and a "rigid" method.

The "Liquid" Method

The "liquid" method adjusts the content width on the fly by having the content width be always a certain percentage of the entire viewport width.
This a accomplished by using the following code:
THE HTML:
ass="wrapper"> all page content goes here

THE CSS: div.wrapper {
margin-left : 10%;
margin-right : 10%;
}

This makes the width of the div.wrapper always 80% of the viewport width, whatever it may be.

The "Rigid" Method

However more designers prefer the "rigid" method which sets the content to a specific pixel width. "Rigid" in this case means setting the "wrapper" to a specific width that will fit most common broswer resolutions without causing a horizontal scrollbar to appear.
It used to be the most common screen resolution was 640px wide. Today however it is much more common to have a 800px or 1024px width. It is not however a good idea to set this width wider like 800px because even with a browser maximized window there are still pixels being used for the vertical scroll bar. To account for this you should use a width of no more than 770px.
How about the user that has his resolution set at 1024px? If the user maximizes their window that leaves appx 230px of horizontal window space left over. It has to go somewhere. The cleanest solution is to split this blank space in half and put it equally on either side of the wrapper. However we can't use ordinary margins to do this. Percentage sized margins won't work with a pixel-sized wrapper. CSS to the rescue....
CSS has a property called "auto" for margins. If the values for the side margins are set to "auto" the resulting side margins become equal and automatically fill the remaining horizontal space, giving us one centered box and equal margins on either side. Just what we want.
This works great in most modern browsers, BUT all versions of Internet Explorer/Win previous to version 6 do not support "auto" margins. Even IE6/Win will fail if the browser is not in "standards" mode based on the doctype of the web page.
So how do we get around this?
Well IE has a bug in it that lets us make a CSS hack to fix this problem.
The CSS property "text-align" can have values of left, right, center, justify, and inherit. This property is normally applied to a block level element such as a paragraph. This causes all the inline content within that element to be aligned with the value assigned to it.
However IE/Win browsers incorrectly apply this property to ALL the elements in the "text-align" box and not just the inline content as it is supposed to. Do you see what this means - IE/Win fails to support "auto" margins, BUT, it does incorrectly center boxes when they are nested inside another box that has "{text-align : center;}.
So how do we use this to get our centered wrapper. We set the body to text-align : center, and then use the wrapper to reset our text to align left.
THE HTML: >
ass="wrapper"> ALL content goes here

>

THE CSS: body {
text-align : center ;
}
div.wrapper {
text-align : left ;
margin-left : auto ;
margin-right : auto ;
}

Now we have a web page with all the content centered in the broswer window with even margins on both sides.
Almost finished. There is one other minor problem that has to be addressed. Gecko-based browsers (Firefox, Netscape, Mozilla) have a problem when using auto side margins. They interpret it very literally. What happens is, if the user narrows the page to less than that of the wrapper width, these browsers will let the content flow off the left and right sides evenly. This means that a horizontal scroll bar will appear and let you scroll right to get that content, but the content sent to the left disappears and cannot be retrieved..
There is a way to fix this problem.
The easiest method is to set a minimum width on the body element that is the same width as our wrapper.
So our final markup looks like this:
THE HTML: >
ass="wrapper"> all content goes here

>

THE CSS body {
text-align : center ;
min-width : 770px ;
}
div.wrapper {
width : 770px ;
text-align : left ;
margin-left : auto ;
margin-right : auto ;
position : relative ;
}

Please notice the last line in the CSS code "position : relative". This line is only needed if you have absolutely positioned elements on your page. (If you look in your code and see anywhere "position : absolute" then you will need to add this line of code to your CSS file. Otherwise you will not get a centered page.)
There is also a method of using a border around your wrapper so you don't need the min-width property, but it introduces another IE/Win bug and hack. For now just stick with the above it will work on all browsers under any operating system.
If you have any questions, I can be reached in our Forums.
Mike Crone (gmcrone)

Creating Dynamic Dropdowns with PHP

Using Dreamweaver and PHP to dynamically populate the dropdown menus in your forms. 2 short video sessions will get you started quickly. Tutorial Files
get_flash_player (1K)
Requires Flash Plugin to work.
php (2K)

Part 1 - Creating Dynamic Dropdowns with PHP

Setting up the Database and creating the PHP files needed for dynamically make new dropdowns.
Time: 06:21
php (2K)

Part 2 - Creating Dynamic Dropdowns with PHP (cont.)

First part continues
Time: 14:32

PHP, A Beginners Guide

For the complete programmer newbie, Dreamweaver Club's resident PHP guru, David Jackson guides you through the world of data driven websites in this series. It starts with an overview of all the tools you need to get the job done, and then explains how to use PHP, Apache and Dreamweaver to create data driven websites.
This series is for anyone who is looking to start to learn the fundementals of datadriven websites. We hope you enjoy them! Requires Flash Plugin to work.
David accepts donations from those that these tutorials have helped. If you would like to donate, click the button below which will bring you to Davids Paypal donation page.
tools (2K)

Part 1 - The Tools of the Trade

An introduction to the tools needed to program with PHP (WAMP).
Time: 03:57
wamp5 (2K)

Part 2 - WAMP 5

Overview of the application installed with WAMP 5.
Time: 03:57
mysqllite (3K)

Part 3 - EMS MYSQL LITE

Register a host using the application.
Time: 04:43
mysqllite (3K)

Part 4 - EMS MYSQL LITE (cont.)

Creating your first Database and Table with test data.
Time: 09:11
dw8 (2K)

Part 5 - Configuring Dreamweaver

Configuring dreamweaver to work locally with a remote server
Time: 10:13

#
### ###