Friends

This is default featured post 1 title

Go to Blogger edit html and find these sentences.Now replace these sentences with your own descriptions.This theme is Bloggerized by Lasantha Bandara - Premiumbloggertemplates.com.

This is default featured post 2 title

Go to Blogger edit html and find these sentences.Now replace these sentences with your own descriptions.This theme is Bloggerized by Lasantha Bandara - Premiumbloggertemplates.com.

This is default featured post 3 title

Go to Blogger edit html and find these sentences.Now replace these sentences with your own descriptions.This theme is Bloggerized by Lasantha Bandara - Premiumbloggertemplates.com.

This is default featured post 4 title

Go to Blogger edit html and find these sentences.Now replace these sentences with your own descriptions.This theme is Bloggerized by Lasantha Bandara - Premiumbloggertemplates.com.

This is default featured post 5 title

Go to Blogger edit html and find these sentences.Now replace these sentences with your own descriptions.This theme is Bloggerized by Lasantha Bandara - Premiumbloggertemplates.com.

Monday, May 2, 2011

How to Change Animated AVI Background Color in Windows Vista Progress Dialog Box?

With the release of Vista, Microsoft has developed a new method of animation in explorer instead of AVIs (Video Clip); here we are sharing a tutorial to change color of Copying, Moving, Deleting, and Applying attributes process.
Requirements:
Instructions:
1. Extract text file from shell32.dll/UIFILE/42.txt using Resource Hacker. (You can find shell32.dll file in C:\Windows\System32)
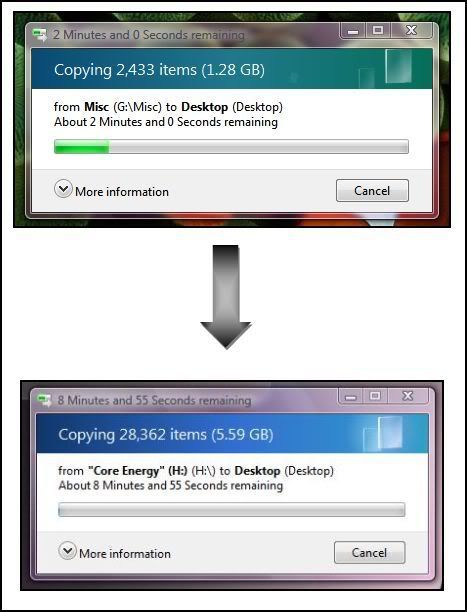
2. Edit Text file using Notepad and use Search feature (press CTRL+F to find the line) and search for background="Gradient
3. You'll get following line of code:
background="Gradient(argb(255, 9, 74, 116), argb(255, 32, 121, 140), argb (255, 5, 111, 90), 3)"
Here argb(X,R,G,B) represents:
X --> Transparency
R --> Red
G --> Green
B --> Blue
4. Replace the code with desired one like following:
background="Gradient(argb(255, 15, 55,107 ), argb (255, 50, 110, 210), argb(255, 50, 160 ,200 ), 3)"
After making changes, save the text file and exit.
5. Now replace this text file in shell32.dll using Resource Hacker. Save shell32.dll and exit.
6. Restart the PC to take effect.
This tutorial was written by our friend Ramesh Kumar who wanted to share it with us...

Download “AeroVG” Theme for Windows Vista

"AeroVG" theme is a new theme for Windows Vista users. Your system must be capable to run Aero to use this theme. This theme has been created specially for Aero users but Basic users can also use this theme. They'll get new Details pane (shell style), new progressbar and many other small changes.
Featured List:
  • More transparent startmenu and taskbar
  • Startmenu has square corners instead of round corners which looks cool
  • Only active window taskbar button is visible to make the taskbar more clean and stylish
  • Checkbox and radio buttons are Apple leopard styled
  • Cool blue progressbar in dialog boxes
  • Blue Control Panel sidebar
  • Cool dialog box buttons
  • Cool Details pane which have different colors for different folders like Video, Pictures, etc
  • Transparent addressbar and searchbar in Explorer
  • Transparent titlebar and taskbar in maximized windows
  • Dark hovered, clicked, selected area in Explorer as well as in menus. Vista default selection bar is very light in color and doesn't look proper sometimes
  • New Menubar & Statusbar
And many other small changes.
Download Link
Alternate Download Link

A Complete Guide for Tweaking User Account Control (UAC) in Windows Vista

Microsoft has added a new feature "User Account Control (UAC)" in Windows Vista which is a good addition. It prevents malicious programs to install in your system as well as it also prevents basic users to accidentally change system critical settings which can be harmful to the system. Although its a good feature but sometimes it becomes annoying to experienced users who know what they are doing with their system. You can disable UAC completely from Control Panel -> User Accounts. But I'll not advise you to disable it but you can tweak it to decrease the no. of prompts.
You can tweak UAC using "Local Security Policy". Following is a step by step guide with all customizable settings:
1. Type "secpol.msc" in RUN dialog box and press Enter. It'll open Local Security Policy.
2. Now goto "Local Policies -> Security Options". In right-side pane, scroll down to last and you'll see following options related to UAC:
User Account Control: Admin Approval Mode for the Built-in Administrator account
Enabled
Disabled

User Account Control: Allow UIAccess applications to prompt for elevation without using the secure desktop.
Enabled
Disabled

User Account Control: Behavior of the elevation prompt for administrators in Admin Approval Mode
Elevate without prompting
Prompt for credentials
Prompt for consent

User Account Control: Behavior of the elevation prompt for standard users
Automatically deny elevation requests
Prompt for credentials

User Account Control: Detect application installations and prompt for elevation
Enabled
Disabled

User Account Control: Only elevate executables that are signed and validated
Enabled
Disabled

User Account Control: Only elevate UIAccess applications that are installed in secure locations
Enabled
Disabled

User Account Control: Run all administrators in Admin Approval Mode
Enabled
Disabled

User Account Control: Switch to the secure desktop when prompting for elevation
Enabled
Disabled

User Account Control: Virtualize file and registry write failures to per-user locations
Enabled
Disabled
You can change them according to your requirements. Like you can enable "Run all administrators in Admin Approval Mode" to remove those annoying prompts if you are using administrator account. You can disable "User Account Control: Switch to the secure desktop when prompting for elevation" to disable the screen fluctuation when the UAC prompts appear.
3. If you are a Windows Vista Home Basic or Home Premium user and want to tweak UAC (User Account Control) settings using secpol.msc, then you'll be out of luck cause secpol.msc is a part of Group Policy Editor and its not included in Vista Home editions.
But don't worry, the same settings can be applied using Windows Registry Editor, so you can also enjoy the UAC tweaks in Vista Home editions using registry editor:
How to Tweak User Account Control (UAC) Options in Windows Vista Home Basic & Home Premium?
4. You can also use a software "TweakUAC" to change the settings easily.
TweakUAC is a free software tool that you can use to quickly turn UAC (User Account Control of Windows Vista) on or off, or to make UAC operate in the quiet mode.
Download TweakUAC

How to Add Aero ON / OFF Shortcuts in Desktop and My Computer Context Menu Under Windows Vista and 7

Whenever you want to turn Aero ON or OFF, you have to do it either from Desktop Properties or from System properties. But did you know there is a very easy shortcut to do it within seconds? Here are 2 commands to turn Aero ON / OFF which are used by Windows Vista and 7:
Command to Turn Aero ON: Rundll32 dwmApi #102
Command to Turn Aero OFF: Rundll32 dwmApi #104
You can give the commands in RUN dialog box or Startmenu Searchbox. You can also create their shortcuts on Desktop or Quick Launch or wherever you want. It can become quite handy in lots of situations like a software has disabled Aero because it was not compatible with Aero or if you are running out of battery in your laptop, etc.
You can also add these commands in Desktop context menu or My Computer context menu. e.g. when you'll right-click on Desktop or My Computer icon, you'll find the shortcuts of "Aero ON" and "Aero OFF" there.
Following is a step-by-step tutorial to Add "Aero ON" and "Aero OFF" options in Desktop and My Computer Context Menu:
Add "Aero ON" and "Aero OFF" in Desktop Context Menu:

1. Open regedit and goto:
HKEY_CLASSES_ROOT\Directory\Background\shell
2. Right-click on the "Shell" key and select "New -> Key".
3. Give it name Aero ON.
4. Now create another key under "Aero ON" with the name “command” and in right-side pane set value of “Default” to:
Rundll32 dwmApi #102
5. Now repeat steps 2-4 to add "Aero OFF" option, i.e. Right-click on the "Shell" key and select "New -> Key".
6. Give it name Aero OFF.
7. Now create another key under "Aero OFF" with the name “command” and in right-side pane set value of “Default” to:
Rundll32 dwmApi #104
8. That's it. Now you'll get both "Aero ON" and "Aero OFF" options in Desktop Context Menu.
Add "Aero ON" and "Aero OFF" in My Computer Context Menu:

1. Open regedit and goto:
HKEY_CLASSES_ROOT\CLSID\{20D04FE0-3AEA-1069-A2D8-08002B30309D} \shell
2. Right-click on the "Shell" key and select "New -> Key".
3. Give it name Aero ON.
4. Now create another key under "Aero ON" with the name “command” and in right-side pane set value of “Default” to:
Rundll32 dwmApi #102
5. Now repeat steps 2-4 to add "Aero OFF" option, i.e. Right-click on the "Shell" key and select "New -> Key".
6. Give it name Aero OFF.
7. Now create another key under "Aero OFF" with the name “command” and in right-side pane set value of “Default” to:
Rundll32 dwmApi #104
8. That's it. Now you'll get both "Aero ON" and "Aero OFF" options in My Computer Context Menu.

WinBubble: Customize and Tweak Your Windows Vista Easily

WinBubble is a nice and small in size utility to tweak lots of hidden settings in Windows Vista. The best thing is, you don't need to install it. Just download it and run the EXE file. Thats it. You'll get lots of cool tweaks there, which might come handy most of the time. A must have software for Vista users.
Download Link
Homepage

How to Remove the Annoying Focus Rectangle in Windows?

In Windows, whenever we select any item, an annoying focus rectangle is shown around it. The rectangle is also shown on buttons, etc in dialog boxes which doesnt look good and many people want to get rid of it. Thanks to our friend "localhost" who made a small program to remove the annoying focus rectangle which works in every version of Windows.

Just download following ZIP file, extract it and run the setup file:
Download Link

Taskbar Shuffle: Move Taskbar and System Tray Buttons in Windows

Now-a-days every browser comes with tab feature and we can easily drag-n-drop tabs to anywhere on the tab bar using our mouse. Its quite handy feature. Did you ever wish the same facility in Windows taskbar? Did you want to have the facility in taskbar to move application buttons anywhere on the taskbar using your mouse? Imagine how interesting would it be to move the buttons on taskbar. Just move them anywhere you want. "Taskbar Shuffle" is a utility which you need. Following are a few interesting features which you get in Taskbar Shuffle:
  • Move running application buttons anywhere on the taskbar.
  • Group similar application buttons at single place.
  • Move System tray buttons.
  • Close applications from the taskbar simply by middle-click on it.
Above are only a few selected features of Taskbar Shuffle. Just give it a try.
Download Link

How to Fix User Folders Showing Simple Folder Icon in Windows Vista?

Lots of Vista users are facing a strange problem and I'm getting lots of mails asking for the solution. The problem is, the folder icons in User folder change from special glass icons to simple folder icons. Look at the following screenshot:

This is how the icons look in User folder which can be accessed using "%userprofile%" command or just select your username in Startmenu (just below the user pic).
But sometimes these icons (all or some) become simple default folder icons. It happens when "Desktop.ini" file becomes corrupted. Actually all these special glass icons are displayed using "desktop.ini" file which is present in each folder (hidden). Sometimes a few software make this file corrupt and these folders start showing simple folder icon.
The solution is very simple. Just replace "desktop.ini" file present in the corrupt folder with default one. The default "desktop.ini" file for each folder is given below. Just download following ZIP file, extract it and copy the default desktop.ini file and paste it in the folder which is showing corrupt icon.Windows will ask to overwrite the existing file, select "Copy & Replace".
Download Link

How to Change Power Button in Windows Vista to Shut Down the System instead of Sleep?

After getting lots of mails asking for "How to Change Power Button in Windows Vista to Shutdown instead of Sleep?", I decided to post a small step-by-step tutorial so that everyone can use it. In Windows Vista, when you click on power button in startmenu, it doesnt shut down your system, instead it puts your system in sleep mode. Which is irritating for some people like those who have dual boot system and want to start other OS next time they switch on their system.
So following is a step-by-step method to change power button function in Vista:

1. Type "powercfg.cpl" in RUN dialog box or Startmenu Search box and press "Enter" key. It'll open "Power Options" window. You can also open it from "Control Panel".
2. Click on "Change plan settings" under your current plan as shown in following screenshot:

3. In next screen click on "Change advanced power settings". It'll open a new window as shown in following screenshot:

4. Now expand "Power buttons and lid" and click on "Start menu power button". Now change "Sleep" to "Shut Down" from the drop down box and Apply it.

How to Re-enable Missing Hibernate Option in Windows Vista?

One of the most common problem in Windows Vista is "Missing Hibernate option in startmenu". I get many mails asking for "how to enable the hibernate option in Vista?". Actually its a known issue in Vista. The hibernate option disappears whenever you run "Disk Cleanup" because Disk Cleanup wizard also removes Hibernate files. So if you use Hibernate then make sure you deselect "Hibernattion File Cleaner" option from the list in future.
Anyway its very easy to re-enable missing Hibernate option by following these simple steps:
1. Click on "Start button -> All Programs -> Accessories". Right-click on "Command Prompt" and select "Run As Administrator". If you are prompted to enter password, enter the password and continue. You can also open Command Prompt in Administrator mode by typing "cmd" in Startmenu Search box and press "Ctrl+Shift+Enter".
2. Now provide any of following commands:
powercfg /hibernate on
powercfg -h on
3. Exit command prompt and Hibernate option should appear in Startmenu.

Windows Vista Services Configuration: Turn Off / Disable Unnecessary Services to Optimize Performance

We have posted service guide for Windows XP in past and now its turn of Windows Vista. In this tutorial we'll learn about the services which are not essential and can be safely set to MANUAL to speed up your system: 1. Right-click on My Computer icon on desktop and select Manage, it'll open a window, in which goto: Services & Application -> Services. To disable or Set a service to MANUAL, double-click on the service and select the desired option in Startup list box.

2.
You can also open the same by going to Administrative Tools and open Computer Management.
NOTE: Always set the service to MANUAL, never disable it. So that whenever windows needs to start a service it can easily start and use it. If you set any service to DISABLED, then windows will not be able to start it and will give ERROR.
So here is the list of services that can be safely set to MANUAL (Many of them may be disabled automatically on some systems):
  • Application Experience
  • Computer Browser (If your computer is not connected to any network)
  • Desktop Window Manager Session Manager (If you don't use Aero theme)
  • Diagnostic Policy Service
  • Distributed Link Tracking Client
  • Indexing service (If you don't use Windows Search feature frequently)
  • Offline Files
  • Portable Device Enumerator Service
  • Print Spooler (If you don't have Printer)
  • ReadyBoost (If you don't use ReadyBoost feature)
  • Remote Registry (Always disable it for Security purposes)
  • Secondary Logon
  • Security Center
  • Server (If your computer is not connected to any network)
  • System Restore (If you don't use System Restore)
  • Tablet PC Input Service
  • TCP/IP NetBIOS Helper Service
  • Themes ( If you use Windows Classic theme)
  • Windows Error Reporting Service
  • Windows Media Center Service Launcher
  • Windows Search (If you don't use Windows Search feature frequently)
  • Windows Time (If you don't want to update system tray clock time automatically)
PS: You can see the details of each service so that you can determine whether it should be disabled or not.

How to Enable / Activate Hidden Administrator Account in Windows Vista and 7

Many people ask me why there is no built-in Administrator account available in Windows Vista and 7 like previous Windows versions? Why can't we use the default Administrator account? The answer is "Yes! The default Administrator account is created in Vista and 7 but its disabled by default for security purposes." You might want to enable it for troubleshooting or to get rid of the annoying UAC prompts while tweaking your system. So here I'll describe a few methods to enable / activate the hidden Administrator account in Windows Vista and 7:
Method A:
1. Right-click on My Computer icon on Desktop and select "Manage", it'll open "Computer Management" window. ( You can also open it by giving "compmgmt.msc" command in RUN dialog box or Startmenu Search box).
2. Goto "Local Users and Groups -> Users". In right-side pane double-click on "Administrator" account. It'll open its Properties. Deselect "Account is disabled" option and Apply it.
Method B:
1. Type "secpol.msc" in RUN dialog box or Startmenu search box, it'll open "Local Security Policy" window.
2. Goto "Local Policies -> Security Options".
3. Double-click on first option "Accounts: Administrator account status" and select "Enabled" and apply it.
Method C:
1. Click on “Start button -> All Programs -> Accessories“. Right-click on “Command Prompt” and select “Run As Administrator“. If you are prompted to enter password, enter the password and continue. You can also open Command Prompt in Administrator mode by typing “cmd” in Startmenu Search box and press “Ctrl+Shift+Enter“.
2. Now provide following command:
net user administrator /active:yes
3. Thats it. The Administrator account will be enabled. If you want to disable it again, simply replace "yes" with "no" in above command.
NOTE: Never activate the hidden Administrator account until required. Its better to use other general accounts for better security. Also the Administrator account has no password, so if you enable it then don't forget to set a strong password for it.

Extend Windows Vista and 7 Trial Period from 30 Days to 120 Days

s we all know Windows Vista and 7 can be used for 30 days trial period without activating or entering Product key. But do you know that there is a trick to extend this 30 days trial period to 120 days?.
To extend Windows Vista and 7 trial period follow these simple steps:
1. Click on “Start button -> All Programs -> Accessories“. Right-click on “Command Prompt” and select “Run As Administrator“. If you are prompted to enter password, enter the password and continue. You can also open Command Prompt in Administrator mode by typing “cmd” in Startmenu Search box and press “Ctrl+Shift+Enter“.
2. Now provide following command:
slmgr -rearm
3. You'll be prompted to restart Windows, restart it and the trial period will be reset to 30 days again.
NOTE: So if you want to enjoy exact 120 days, then give above mentioned command on the 30th day when your trial period is going to end. The command works only 3 times, that's why its limited to only 120 days. You can check the Trial period by going to System Properties.

How to Change Menu Position from Left to Right in Windows Vista and 7

I have received many mails from people regarding Menu position in Windows Vista and 7. In previous Windows versions, menus used to appear at right-side of the mouse cursor but in Windows Vista and 7, menus appear at left side of the cursor. It doesnt happen for everyone but majority of people is facing this issue even I have faced it in my Windows.
So here I'm posting a small tutorial on how to change menus position in Windows Vista and 7. Actually its not a bug, you can set the menu position according to your requirements.
1. Open Control Panel and double-click on "Tablet PC Settings":
2. It'll open a new window where you can select any of following 2 options:
  • Right-handed
  • Left-handed

3. That's it. Apply it and you have done.

How to Remove Location History from Desktop Background List in Windows Vista and 7

If you are using Windows Vista or 7 and want to remove the "Location" history from "Desktop Background" list, then this trick is for you. In Windows Vista and 7, you can change the Desktop Wallpaper by right-clicking on Desktop and select "Personalize" and then click on "Desktop Background" and Apply your desired wallpaper by browsing to the folder.
But whenever you browse a folder for the wallpaper, its location is stored in drop-down box and everyone can use that path:

So if you want to remove the entire history or any particular path from it, then please follow these steps:
1. Open regedit and goto:
HKEY_CURRENT_USER\Software\Microsoft\Windows\CurrentVersion\ Explorer\Wallpapers\Images
2. In right-side pane, you'll see all the directory paths. Simply delete the desired key associated with the path which you want to remove.
3. Thats it. Now you can check the Desktop Background list and your deleted path will not be present there.

How to Remove Windows has Blocked Some Startup Programs Notification in Windows Vista?

Are you using Windows Vista and getting the annoying "Windows has Blocked Some Startup Programs" notification in system tray? If you want to get rid of this notification, then this tutorial is for you. Actually it happens when a program or service that has User Account Control (UAC) restrictions tries to start in the Windows Vista and Windows Defender's Software Explorer blocks the program or service from running.

So you can enable / disable the program or service to get rid of that notification.
1. Click on the "Blocked startup programs" icon in system tray.
2. To allow the program to run, click on "Run blocked program" option and click on the program or service in the list.
3. To disallow the program, click on "Show or remove blocked startup programs" option, it'll open "Software Explorer" in "Windows Defender".
4. Now locate and select the startup program or service which you disabled recently in Software Explorer.
5. Click on "Disable" and then "Yes" in the confirmation dialog box.

How to Restrict Users from Changing Internet Explorer Homepage Settings?

In many organizations, administrator wants to set a permanent Homepage in Internet Explorer like their Intranet address and they also want to restrict users from changing it. Some spyware also change IE Homepage to some other URLs. So I'll tell here the tricks for both "Setting your desired page as homepage" as well as "Restricting users to change the homepage":
A. To Set the Homepage:
1. Open regedit and goto:
HKEY_CURRENT_USER\Software\Microsoft\Internet Explorer\Main
2. In right-side pane, change value of Start Page to your desired URL, like http://www.AskVG.com/
B. To restrict users from changing homepage:
1. Open regedit and goto:
HKEY_CURRENT_USER\Software\Policies\Microsoft\Internet Explorer
2. Under this key create new key "Control Panel". Now in right-side pane, create a new DWORD value HomePage and set its value to 1. It'll disable all 3 buttons "Use current", "Use default" and "Use blank" in Internet Options.
TIP: If these buttons have been disabled in your system by spyware and you want to enable them, then simply change value to 0.
If you want a ready made .REG file to automate the task, then download following ZIP file, extract it and then run the extracted .REG file:
askvg_ie_homepage_restrict.zip
NOTE: in the above .REG file, I have set "Start Page" to "http://www.AskVG.com/", change this URL with your desired URL and then save the file.

#
### ###