Friends

This is default featured post 1 title

Go to Blogger edit html and find these sentences.Now replace these sentences with your own descriptions.This theme is Bloggerized by Lasantha Bandara - Premiumbloggertemplates.com.

This is default featured post 2 title

Go to Blogger edit html and find these sentences.Now replace these sentences with your own descriptions.This theme is Bloggerized by Lasantha Bandara - Premiumbloggertemplates.com.

This is default featured post 3 title

Go to Blogger edit html and find these sentences.Now replace these sentences with your own descriptions.This theme is Bloggerized by Lasantha Bandara - Premiumbloggertemplates.com.

This is default featured post 4 title

Go to Blogger edit html and find these sentences.Now replace these sentences with your own descriptions.This theme is Bloggerized by Lasantha Bandara - Premiumbloggertemplates.com.

This is default featured post 5 title

Go to Blogger edit html and find these sentences.Now replace these sentences with your own descriptions.This theme is Bloggerized by Lasantha Bandara - Premiumbloggertemplates.com.

Sunday, June 12, 2011

Download Windows 7 and Server 2008 R2 Service Pack 1 (SP1) Documentation

Microsoft has released documentation for Windows 7 and Windows Server 2008 R2 Service Pack 1 (SP1). The following documentation is provided by Microsoft:
  • Deployment Guide for Windows Server 2008 R2 with SP1 and Windows 7 with SP1
  • Hotfixes and Security Updates included in Windows 7 and Windows Server 2008 R2 Service Pack 1
  • Installing Windows Server 2008 R2 with SP1
  • Release Notes for Windows 7 with SP1
  • Release Notes for Windows Server 2008 R2 with SP1
Download Link

7 Sidebar: Tweak Windows 7 Sidebar Settings, Change Background, Always on Top, Auto Hide, Set Orientation

"7 Sidebar" is an excellent gadget for Windows 7 sidebar. It puts a Vista like glassy background to sidebar and also sets it to "Always on Top". 7_Sidebar.png
You can also tweak various settings. Just right-click on the empty area of sidebar and select "Settings" option. It'll open 7 Sidebar's Settings window:
7_Sidebar_Settings.png
Here you can set various settings like:
  • Sidebar orientation: Left or Right
  • Enable/disable Always on top option
  • Enable/disable Auto-hide option
  • Change sidebar background
You just need to download and install the gadget. You can download it using following link:
Download Link

Important Things to Know about Windows 7 and Server 2008 R2 Service Pack 1 (SP1), RTM Released to Public, Download NOW

Microsoft has released Windows 7 and Server 2008 R2 Service Pack 1 RTM to public which can be downloaded using following link:
Download Link
You can also use direct download link:
Direct Download Link
Let us tell you again that SP1 is a joint release for both Windows Server 2008 R2 and Windows 7.
SP1 doesn't contain any new features that are specific to Windows 7 itself. For Windows 7, SP1 is simply a combination of updates already available through Windows Update and additional hotfixes based on feedback by customers and partners.
From the server side, two key new features have been included:
Dynamic memory is an enhancement to Hyper-V in R2 and allows IT administrators to pool all the memory available on a physical host and dynamically distribute it to virtual machines running on that host as necessary. That means based on changes in workload, your VMs will be able to receive new memory allocations without a service interruption.
RemoteFX is the latest addition to Microsoft’s desktop virtualization stack. Using this new feature in Windows Server 2008 R2, you’ll be able to deliver an even richer and more user-transparent desktop virtualization experience. RemoteFX functions independently of any graphics stack and supports any screen content, including rich content like Silverlight or Flash. It also enhances the end-user’s hardware experience with support for USB redirection. Because it uses virtualized graphics resources, RemoteFX works on a wide array of target devices, which means you can deploy it over both thick and thin client hosts and a wide variety of network configurations.

[Direct Download Link] Download Windows 7 and Server 2008 R2 Service Pack 1 (SP1) RTM

Microsoft has released Windows 7 and Server 2008 R2 SP1 RTM to public: Windows 7 and Windows Server 2008 R2 SP1 RTM Released
If you don't want to waste your time in looking for the download links, here are the direct download links for SP1 RTM:
Download SP1 RTM EXE (32-bit) (537.809 MB)
Download SP1 RTM EXE (64-bit) (903.196 MB)
Download SP1 RTM ISO (32-bit & 64-bit) (1953.3 MB)

How to Uninstall Windows 7 and Server 2008 R2 Service Pack 1 (SP1)?

In this tutorial, we'll tell you how to uninstall Windows 7 SP1 from your system if you are facing any problem after installing it: There are 2 methods to uninstall SP1:
  • Using Control Panel
  • Using Command Prompt
Method 1: Using Control Panel
1. Open Control Panel and click on "Programs -> Uninstall a program" if you are using "Category" view.
If you are using "Icons" view, click on "Programs and Features" icon.
2. Now click on "View installed updates" link given in left sidebar.
3. Select the "Service Pack for Microsoft Windows (KB976932)" item in the given list and click on "Uninstall" button in the toolbar. You can also right-click on the update and select "Uninstall" option.
4. It'll ask for confirmation, click on "Yes" button.
That's it. It'll take some time and will uninstall SP1 from your system.
Method 2: Using Command Prompt
1. Click on “Start button -> All Programs -> Accessories“. Right-click on “Command Prompt” and select “Run As Administrator“. If you are prompted to enter password, enter the password and continue. You can also open Command Prompt in Administrator mode by typing “cmd” in Startmenu Search box and press “Ctrl+Shift+Enter“.
2. Now provide following command and press Enter:
wusa.exe /uninstall /kb:976932
3. It'll ask for confirmation, click on "Yes" button.
That's it. It'll take some time and will uninstall SP1 from your system.

WMP12 Library Background Changer: Free Utility to Customize Windows Media Player 12 Library Background Image in Windows 7

We have told you in past how to customize background of Library view in Windows Media Player 12 in Windows 7 using Windows Registry: Customize Windows Media Player 12 (WMP12) Library Background Image in Windows 7
You need to modify a key in Windows registry to change WMP background image. The above tutorial also tells you how to use your own desired image as WMP background.
Today we are going to share a free utility which can do the task automatically. So you don't need to manually edit registry or system files.
Our friend "Happy Bulldozer aka hb860" has created an excellent utility "WMP12 Library Background Changer" which allows you to easily select the background image from the built-in image set. It also allows you to replace any existing image with your own desired image. You can also set the current wallpaper as WMP background image.
WMP12_Library_Background_Changer.png
You can download it using following link:
Download Link

OEM Configurer: Utility to Add Customized Strings (OEM Information) in System Properties Dialog Box of Windows XP, Vista and 7

We have posted tutorials for customizing System Properties window in Windows XP, Vista and 7: The above tutorials inspired our reader "Masroor Aijaz aka JX Great" and he created an awesome portable utility "OEM Configurer" which allows you to customize Windows XP, Vista and 7 System Properties window look without any manual editing. You just need to enter desired text and select desired logo file and it'll do the rest automatically.

It also allows you to customize and change various items in System Properties window like Owner name, processor name, etc.
Download Link

Coolbarz: Get Good Old Desktop Toolbar (Deskbar) Back in Windows 7

Desktop toolbar was one of the most useful feature of Windows but sadly Microsoft removed it from Windows 7. In previous Windows versions, you could simply add a new toolbar to Taskbar and then drag-n-drop it to Desktop to create a new toolbar on Desktop. You could put it to left, right, top or bottom according to your requirements. Our friend "Brynt Younce" has created an awesome portable utility which is called "Coolbarz". It allows you to create the same Deskbar in Windows 7.

Here is what Brynt says about his tool:
Coolbarz provides you with desktop toolbars for quick and easy access to your most commonly used programs. This feature used to be fully implemented within Windows allowing you to create and dock your own custom toolbars on the desktop, but seems to have been recently removed in the latest versions of Windows. Disappointed by that decision, I decided to create a solution that allowed me to continue using desktop toolbars. While Coolbarz was created for Windows 7, it works great on previous versions of Windows as well. It's currently in beta version.
Features List:
  • Provides up to 4 toolbars for adding shortcuts to any side of the screen.
  • Conveniently customizable to suit your functional and visual needs, including fading effects.
  • Standalone tool with no installation required.
  • Easy to use and friendly interface with update notifications.
Download Link
Homepage
Thanks again to "Brynt Younce" for creating and sharing it...

What Happened to the Quick Launch Toolbar in Windows 7?

We have covered this topic in past when Windows 7 was released by Microsoft: Has Microsoft Removed Quick Launch Toolbar in Windows 7?
Windows 7 comes with new feature "Pinned items" which has replaced the good old Quick launch toolbar from Windows 7. Although you can get the Quick Launch toolbar back in Windows 7 using this tutorial.
Recently our active reader "Uewd" found out an interesting thing. Microsoft has also mentioned in Windows help why did they remove Quick Launch toolbar in Windows 7.
1. Click on Start ORB (Start button) and type "What Happened" in search box.
What_Happened_to_Quick_Launch_Toolbar.png
2. Click on the link present in Search results or simply press Enter.
3. It'll open a Help window which will tell you the reason behind removal of Quick Launch toolbar from Windows 7.
What_Happened_to_Quick_Launch_Toolbar2.png
Interesting find by Uewd...

QTTabBar is Back in Action, Add Tab Feature to Windows Explorer

We have already posted about "QTTabBar" in past when it was developed for Windows XP and Vista users. Suddenly its development was stopped by the developer. Now a new version of QTTabBar is available for download which comes with lots of new improvements and support for Windows 7 as well.
QTTabBar is a wonderful shell extension adding tabs and many other features to Windows Explorer. The extension was written by a Japanese developer known as "Quizo" and now its being updated by "Paul Accisano".
QT_Tabbar.png
What's New?
  • Now works in Windows 7 as well
  • Desktop Bar restored for XP/Vista
  • F2 rename selection functionality restored
  • "Use old ListView control" option enabled
  • "Display column headers in all views" option enabled
  • General stability improvements
  • Tabbar/Toolbar positioning now works correctly on XP
  • Search box no longer mysteriously shrinks when focused
  • Full Row Select can be enabled/disabled when the SysListView32 is used
  • Libraries can be dropped into
You can download it using following link:
Download Link
Once you install it, you can add it to Windows Explorer by going to "View -> Toolbars" menu or by right-clicking on Menubar and selecting the option.
Thanks to our reader "tony bombata" for the news...

[UPDATE] Download Leaked Windows 8 Metro Inspired “Aero Lite” Theme for Windows 7

Recently we posted about a leaked build of Windows 8 which features a new Metro inspired "Aero Lite" theme. Leaked Windows 8 Build Features “Aero Lite” Metro UI and Language Explorer
Now you can enjoy the theme in Windows 7. Our friend "thepanda-x" @ DA has created a look-like theme for Windows 7 which provides the awesome Aero Lite interface in Windows 7.

You can download it using following link:
Download Link
For more information on how to use this theme, please visit following link:
How to Use 3rd Party Themes in Windows 7?

Microsoft Releases Update to Support New Currency Symbol for Indian Rupee

As we all know Indian government has introduced a new symbol for Indian currency "Rupee" which looks as following: Indian_Currency_Rupee_New_Sumbol.png
Now Microsoft has released an update to support this new currency symbol for the Indian Rupee in Windows Vista, Server 2008, 7 and Server 2008 R2.
This update installs updated versions of following fonts:
  • Microsoft Sans Serif
  • Times New Roman
  • Arial
  • Segoe
  • Tahoma
This update also includes font support, locale changes, and keyboard support.
Download Links:

Restarter: Restart Explorer, uxms Service and Kill Not Responding Tasks Using Windows System Tray

We have posted following tutorials in past: The above tutorials inspired our reader "Masroor Aijaz aka JX Great" and he created an awesome app "Restarter".
"Restarter" is a very small and portable utility which sits in system tray and allows you to directly "Restart Explorer", "Restart uxms Service" and "Kill Not Responding Tasks" using its context menu.
As a bonus, it also allows you to start a few useful Windows utilities: Task Manager, Calculator and Notepad.
You can also log off, restart and shut down your system using it.
Simply click on it or right-click on it and select the desired option.

It also allows you to add it to Startup.
Download Link

[UPDATE] Classic Shell: Get Classic Start Menu, Classic IE9 and Explorer Toolbar Buttons (Cut, Copy, Paste, etc) Back in Windows Vista and 7

UPDATE: New version comes with "Classic IE9" feature which brings back caption in titlebar and also shows Security Zone and progressbar in IE9 Statusbar.
The most annoying problem which Windows Vista and 7 users face is the removal of classic toolbar buttons e.g. Cut, Copy, Paste, Delete, etc. Windows Vista and 7 Explorer doesn't provide these basic toolbar buttons and users have to use keyboard shortcuts keys or menus to perform these operations.
Another annoying problem in Windows 7 is the removal of Classic Start menu. Windows 7 doesn't contain the good old Classic start menu. It only provides Vista like new Start menu.
Today we are going to share an awesome free utility which brings back the Classic Start menu in Windows 7. It also adds good old Explorer toolbar buttons in Windows Vista and 7.
"Classic Shell" is a free small utility which provides:
  • Classic Start menu in Windows 7
  • Classic Explorer toolbar buttons (Cut, Copy, Paste, etc) in Windows Vista and 7
  • Classic IE9 (titlebar text and progressbar in statusbar)
Following are a few screenshots of Classic Shell in action:
Classic Start menu in Windows 7:
Classic_Shell_Startmenu.png
NOTE: You can access the default Windows 7 Start menu by pressing "SHIFT" key while clicking on the Start ORB (Start button). You can also change Classic Start menu settings by going to "Settings -> Classic Start Menu" option.
Classic Explorer toolbar buttons in Windows Vista and 7:
Classic_Shell_Explorer.png
Classic Explorer Navigation pane in Windows Vista and 7:
Classic_Shell_Explorer2.png
Its highly customizable, so you can select which buttons should appear in Explorer toolbar by clicking on the "Classic Explorer Settings" button present at last of the toolbar in Explorer.
If you don't get the Classic toolbar in Explorer after installing the utility, press "ALT" key to show Menubar, right-click on it and select "Classic Explorer Bar" option.
You can download it using following link:
Download Link
Homepage
Thanks to our reader "Tuxplorer" for the update...

Put Aero Glass Effect in Command Prompt in Windows Vista and 7

If you use Command Prompt frequently in Windows and want to get Aero glass effect in it, here is something interesting for you. Our friend "Solo-Dev" @ DA has created "AeroCmd" which provide full glass in Command Prompt:

It works in Windows Vista and 7. Windows XP is not supported.
Simply download the ZIP file, extract it and run the app.
Download Link

Windows 7 Branding Changer: Small Utility to Customize Branding Logo in Windows 7 Login Screen

We have posted  a detailed tutorial in past which shows you how to remove Branding logo from Windows 7 login screen: How to Remove “Branding Logo” and “Ease of Access” (Accessibility) Button from Windows Vista and 7 Login Screens?
If you want to customize the branding logo i.e. change the branding logo text, following utility will help you:
"Windows 7 Branding Changer" is an excellent, small and portable utility created by "myjuman" @ DA which allows you to change Windows 7 login screen's branding logo quickly and easily.

You just need to create a PNG file using an image editing software like Adobe Photoshop, Gimp, Paint.NET, etc, then select this PNG file using Load Picture button and at last Apply the image. It'll immediately change the text.
For your information, it modifies "Basebrd.dll" file present in "%windir%/branding/basebrd" folder and replaces the existing image with your desired one.
You can create the PNG image of 350x50 pixels.
It works perfect in 32 and 64-bit versions of Windows 7.
You can download it using following link:
Download Link

Get Windows 8 Look-Like User Picture Tile (Avatar) in Notification Area of Windows 7

If you are regularly reading our blog posts about Windows 8, you might have noticed that Windows 8 testing build comes with a small user picture tile (aka avatar) in notification area of Taskbar:
Since you can't get your hands on Windows 8 builds atm, we are sharing an awesome utility created by "Stealth2010" and shared by "AngelWZR" @ DA which brings the same user picture tile to Windows 7 Taskbar notification area.
Simply download the file, extract it and run the EXE file. It'll immediately add the user picture tile to notification area.
Download Link

Aura: Get Windows 8 Aero Auto-Colorization Feature in Windows Vista and 7

Recently we posted about a new feature called "Aero Auto-Colorization" found in Windows 8 build.
Windows 8 to Feature Aero Automatic Colorization
"Aero Auto-Colorization" is the ability to automatically configure the color of Aero elements, like the Start Menu, Windows Explorer windows, and the taskbar based on the desktop wallpaper.
Now you can get the same functionality in Windows Vista and 7 using a freeware "Aura".
Aura is an excellent program developer by Stealth2010 which calculates average color of desktop background image or active window icon and sets it as Aero Glass color. It works like color hot-track in Windows 7 taskbar.

It works in Windows Vista and 7.
Download Link
Thanks to our reader "Bill" for sharing it...

Start Menu XP: Get XP Style “All Programs” Drop-Out List in Windows Vista and 7

In Windows XP, the "All Programs" list is shown as drop-out list. In Windows Vista and 7, the list is shown inside the start menu. "Start Menu XP" makes the list of programs in Vista and 7 "drop out" just like it did in Windows XP. This feature allows you to use all screen space and find the necessary programs faster.
You can also organize programs in “virtual groups” (Office, Games, etc.). Since these groups are virtual, you won't see empty folders after uninstalling the programs. Groups can be "folded" (minimized) to make finding and launching your programs easier.

Download Link
Homepage

Microsoft Releases “Windows XP End Of Support Countdown” Sidebar Gadget for Vista and 7 Users

Microsoft is going to end support for Windows XP in 2014 and to celebrate the end of support, Microsoft has released a sidebar gadget for Windows Vista and 7 users. "Windows XP End of Support" gadget shows the number of days remaining until Windows XP End of Support in 2014.
This gadget is displayed on Windows Vista and 7 Desktop sidebar.
You can download it using following link:
Download Link

[FIX] Open, Edit and Print Context Menu Items Missing in Windows 7 When 15+ Files Selected

Recently one AskVG reader "G. M. Polard" asked us following question via contact form:
Whenever I select more than 15 files or folders in Windows 7 Explorer, I can't see Open, Edit and Print items in context menu. How to fix this problem so that I can perform these operations on 15+ files?
Actually its not a problem. Its a feature by design. Microsoft designed Windows 7 to automatically disable these 3 context menu options when user selects more than 15 items in Explorer to prevent accidentally performing these actions on large set of files.
If you want, you can remove this restriction and can enable these 3 items in context menu for 15+ files/folders selection.
Simply follow these simple steps:
1. Type regedit in RUN or start menu search box and press Enter. It'll open Registry Editor.
2. Now go to following key:
HKEY_CURRENT_USER\Software\Microsoft\Windows\CurrentVersion\Explorer
3. In right-side pane, create a new DWORD value MultipleInvokePromptMinimum and set its value to 16
Fix_Context_Menu_Items_Missing_in_Windows_7.png
4. Close Registry Editor and log off or restart your system. It'll remove the restriction and you'll get Open, Edit and Print items in context menu even if you select more than 15 files or folders.
NOTE: To restore default function, simply delete DWORD value created in Step 3.
PS: If you want a ready-made registry script to do the task automatically, simply download following ZIP file, extract it and run the extracted REG file:
Download Registry Script

How to Change “Get More Gadgets Online” Link in Windows Vista and 7 Sidebar Gadget Gallery Window?

When you open Desktop Gadget Gallery window in Windows Vista or 7, you get a link "Get more gadgets online" in the bottom right corner of the window: Windows_Sidebar_Gadgets_Gallery.png
When you click on it, it opens the default Microsoft gadget webpage in your browser.
Using this tutorial, you can customize this link and can change it to any of your favorite website. You can change the link to another 3rd party gadgets download website. Or you can change it to your organization website or completely disable it if you don't want your employees to download gadgets from Internet.
So without wasting any time, lets start the tutorial:
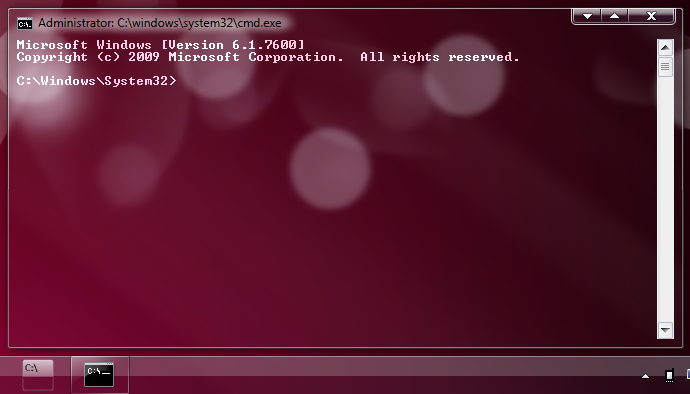
1. Type regedit in RUN or start menu search box and press Enter. It'll open Registry Editor.
2. Now go to following key:
HKEY_CURRENT_USER\Software\Microsoft\Windows\CurrentVersion\Policies
3. Under Policies key, look for a key named Windows. If you don't find it, create a new key with the name Windows.
4. Create another new key Sidebar under Windows key.
So the final registry key path would be:
HKEY_CURRENT_USER\Software\Microsoft\Windows\CurrentVersion\Policies\Windows\Sidebar
5. Now in right-side pane, create a new String value OverrideMoreGadgetsLink and set its value to your desired URL.
For example, you can set it to http://www.askvg.com/ to open AskVG website. Or you can set it to any of your favorite website URL. If you want to disable the link, you can set it to localhost or a simple dot (.) or change it to a slash, etc.
Override_More_Gadgets_Link.png
6. That's it. Now whenever you click on the link, it'll open your favorite website in browser.
NOTE: If you want to restore default link, simply delete the String created in Step 5.
PS: If you want a ready-made registry script to do the task automatically, download following ZIP file, extract it and run the extracted REG file. It'll ask for confirmation, accept it:
Download Link
The above REG file will change the URL to AskVG.com homepage. To change the URL in REG file, right-click on the file and select Edit option. It'll open the file in Notepad. Now you can customize the URL.
If you like this, you might also like other similar articles in following section: Windows 7, Windows Vista.
You should also take a look at our archive to read other interesting articles.
And don't forget to check out our free and useful software in Downloads section.

How to Add “Disk Cleanup” Option in Drive Context Menu in Windows XP, Vista and 7

"Disk Cleanup" is a very useful tool in Windows which removes temporary files and a variety of system files and other items that you no longer need. It helps in freeing up disk space. You can access it using Drive Properties or All Programs menu. Wouldn't it be great if you can launch it directly by right-click on a drive?
In this tutorial, we'll tell you how to add "Disk Cleanup" option in Drive context menu so that you can launch it quickly and easily.
Disk_Cleanup_Option_Drive_Context_Menu.png
Simply follow these simple steps:
1. Type regedit in RUN or startmenu search box and press Enter. It'll open Registry Editor.
2. Now go to following key:
HKEY_CLASSES_ROOT\Drive\shell
3. Under "shell" key, create a new key Disk cleanup
4. If you want to show an icon for context menu option, select "Disk cleanup" key and in right-side pane, create a new String icon and set its value to cleanmgr.exe
PS: You can also change its position in context menu using position String. Check this topic for more information.
5. Now create another new key under Disk cleanup key and give it name command
6. Select command key and in right-side pane, change value of default to cleanmgr.exe /d %1
Add_Disk_Cleanup_Option_Drive_Context_Menu.png
That's it. Now you can access the option in drive context menu.
PS: If you want a ready-made registry script to do the task automatically, simply download following ZIP file, extract it and run the extracted REG file. It'll ask for confirmation, accept it:
Download Registry Script
If you like this, you might also like other similar articles in following section: Windows 7, Windows Vista, Windows XP.

How to Add “Defragment” Option in Drive Context Menu in Windows XP, Vista and 7

Hard disk fragmentation causes your hard disk do extra work which slows down your computer. Disk Defragmenter tool in Windows rearranges fragmented data so that your hard disk drives can work more efficiently. You can access it using Drive Properties or All Programs menu. Wouldn't it be great if you can launch it directly by right-click on a drive?
In this tutorial, we'll tell you how to add "Defragment" option in Drive context menu so that you can launch it quickly and easily.
Defragment_Option_Drive_Context_Menu.png
Simply follow these simple steps:
1. Type regedit in RUN or startmenu search box and press Enter. It'll open Registry Editor.
2. Now go to following key:
HKEY_CLASSES_ROOT\Drive\shell
3. Under "shell" key, create a new key Defragment
4. If you want to show an icon for context menu option, select "Defragment" key and in right-side pane, create a new String icon and set its value to defrag.exe
PS: You can also change its position in context menu using position String. Check this topic for more information.
5. Now create another new key under Defragment key and give it name command
6. Select command key and in right-side pane, change value of default to any of following:
defrag.exe /u /v %1 (for classic command line screen)
dfrgui.exe (for new graphical interface)
Add_Defragment_Option_Drive_Context_Menu.png
That's it. Now you can access the option in drive context menu.
PS: If you want a ready-made registry script to do the task automatically, simply download following ZIP file, extract it and run the extracted REG file. It'll ask for confirmation, accept it:
Download Registry Script
If you like this, you might also like other similar articles in following section: Windows 7, Windows Vista, Windows XP.
You should also take a look at our archive to read other interesting articles.
And don't forget to check out our free and useful software in Downloads section.

Download Control Panel Sidebar Gadget for Windows Vista and 7

We use many system utilities like Registry editor, MSConfig, Services manager, Programs and features, etc regularly in our Windows OS. Wouldn't it be great to have all these utilities in a single place? "ChekoGB" @ DA has created an awesome sidebar gadget for Windows Vista and 7 users which contains many useful system utilities in a single place:

This gadget shows following system utilities:
  • Registry Editor
  • System Configuration
  • Disk Management
  • Device Manager
  • Services
  • Administrative Tools
  • System Restore
  • Network Connections
  • Programs and Features
  • Windows Features
  • Backup and Restore
  • Devices and Printers
  • Performance Monitor
  • System Information
  • Control Panel
  • CMD Prompt
  • Run
  • Computer Management
  • ODBC Data Source Administrator
  • Windows Firewall with Advanced Security
  • Power Shell
  • Power Shell ISE
You can download it using following link:
Download Link
If you like this, you might also like other similar articles in following section: Windows 7, Windows Vista.
You should also take a look at our archive to read other interesting articles.
And don't forget to check out our free and useful software in Downloads section.

Add Context Menu Option to Extract / Unpack Files from MSI (Microsoft Installer) Package

A Microsoft Installer (MSI) package contains various files which are extracted and installed in your system once you run the MSI file. If you don't want to run MSI file but want to view its content, this tutorial will help you.
This tutorial will help you in adding "Unpack" option to MSI file context menu so that you can extract / unpack MSI package files quickly and easily.
Unpack_Extract_Option_MSI_Context_Menu.png
Once you select "Unpack" option from an MSI file context menu, it'll extract the MSI package and will put all the files in a new folder with the name "MSI_file_name Content".
So without wasting time, lets start the tutorial:
1. Type regedit in RUN or startmenu search box and press Enter. It'll open Registry Editor.
2. Now go to following key:
HKEY_CURRENT_USER\Software\Classes
3. Under "classes" key, create a new key Msi.Package
4. Under "Msi.Package" key, create a new key shell
5. Under "shell" key, create a new key Unpack
6. Under "Unpack" key, create a new key command
So the final registry path would be:
HKEY_CURRENT_USER\Software\Classes\Msi.Package\shell\Unpack\command
7. Select command key and in right-side pane, change value of default to:
msiexec.exe /a "%1" /qb TARGETDIR="%1 Content"
Add_Unpack_Extract_Option_MSI_Context_Menu.png
That's it. Now you can access the option in MSI file context menu.
PS: If you want a ready-made registry script to do the task automatically, simply download following ZIP file, extract it and run the extracted REG file. It'll ask for confirmation, accept it:
Download Registry Script
If you like this, you might also like other similar articles in following section: Windows 7, Windows Vista, Windows XP.
You should also take a look at our archive to read other interesting articles.
And don't forget to check out our free and useful software in Downloads section.

Create Direct Shortcut for “Notification Area Icons” in Windows Vista and 7

If we want to customize notification area icons settings in Windows 7, we have to first open Taskbar Properties and then click on Customize button to change them. Windows XP and Vista users also have to follow similar steps to access the Settings page. Customize_Notification_Area_Icons.png
Wouldn't it be great if you can have a direct shortcut to "Notification Area Icons" window so that you can access it within a click?
Recently one AskVG reader "Macko" asked about via email:
Dear Mr. Vishal Gupta,
Long time I've been reading your blog for tweaking XP issues, and they are quite awesome. Yet, I have a question for you, since I do not know where to look for the answer. I want to create a shortcut for "Customize Notifications" (the same as TaskBar Properties/Notification Area/Customize) and I cannot find the way. I hope you can help me.
Greetings!!!
So today in this tutorial, we are going to tell you how to create a shortcut to "Notification Area Icons" in Windows Vista and 7. We have tested it in Windows 7 but it should also work in Windows XP and Vista:
1. Right-click on Desktop and select "New -> Shortcut":
New_Shortcut.png
2. It'll launch "Create Shortcut" wizard. Now enter any of following strings in location box:
explorer shell:::{05d7b0f4-2121-4eff-bf6b-ed3f69b894d9}
or
%SystemRoot%\System32\rundll32.exe shell32.dll,Options_RunDLL 5
Create_Customize_Notification_Area_Icons_Shortcut.png
3. After entering the location, click on "Next" button. Now type Customize Notification Area Icons in name box and click on "Finish" button. It'll create a new shortcut on Desktop.
4. Now its time to change the icon. Right-click on the shortcut and select "Properties". Click on "Change Icon" button. Type taskbarcpl.dll in text box and press Enter. Select the first icon, click on OK button and then Apply the changes.
5. That's it. You'll get the desired shortcut on Desktop:
Customize_Notification_Area_Icons_Shortcut.png
You can also put it in Quick launch toolbar or pin to Taskbar in Windows 7.
NOTE: If you don't want to create the shortcut manually and want a ready-made shortcut, download following ZIP file, extract it and you'll get the shortcut:
Download Link
If you like this, you might also like other similar articles in following section: Windows 7, Windows Vista.
You should also take a look at our archive to read other interesting articles.
And don't forget to check out our free and useful software in Downloads section.

Personalization Panel Allows You to Change Desktop Wallpaper, Get Transparency and Much More in Windows 7 Starter and Home Basic Editions

Windows 7 Starter and Home Basic editions are pretty much restricted in customizing GUI. You can't have Aero theme, you can't change Desktop wallpaper. In fact, you don't see "Personalize" menu in Desktop context menu to change theme, wallpaper, screen saver, sounds, etc. Our friend "Happy Bulldozer aka hb860" has created an awesome "Personalization Panel" for Windows 7 Starter and Home Basic editions which brings the Personalization panel of Windows 7 Ultimate edition to these low-end restricted editions.
Personalization_Panel_Windows_7_Starter_Home_Basic.png
It allows you to:
  • Change Desktop wallpaper
  • Theme support
  • Aero glass support
  • Desktop context menu integration
  • Change window and taskbar color
  • Portable version also available
Its a must have program for Windows 7 Starter and Home Basic edition users.
You can download it using following link:
Download Link
If you like this, you might also like other similar articles in following section: Software, Windows 7.
You should also take a look at our archive to read other interesting articles.
And don't forget to check out our free and useful software in Downloads section.

#
### ###