
In this tutorial you will learn how to crop an object out of its surroundings in a non-destructive way. Non-
destructive means without damaging the original picture by using the erase tool or having to duplicate the
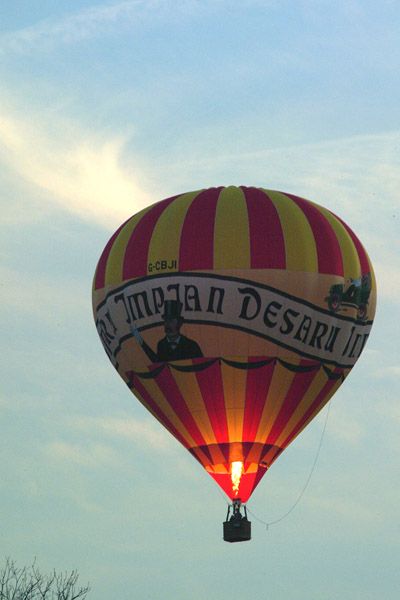
original picture a bunch of times. The pictures I am using is a hot air balloon, because it has both straight
and curved lines, and the standard picture that comes with every PC within the "My Pictures" folder. Click
here and here to download these pictures. (Picture can only be used in conjunction with this free tutorial anything
else is a copyright violation.)
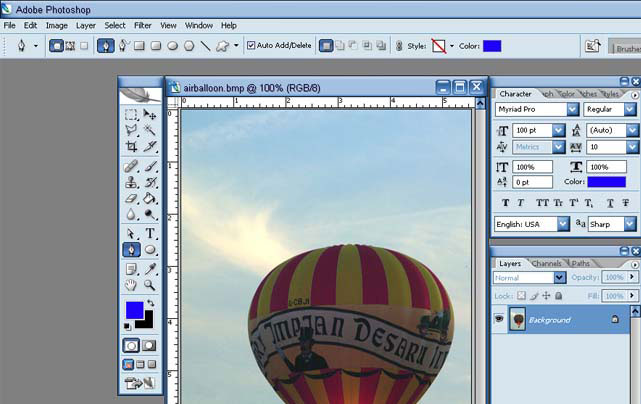
1. First open the picture and select the pen tool, select a color that is different than your picture. I
usually like to use blue. Then right click on the balloon layer and select "Duplicate Layer" and delete the
original Background layer. When a picture is brought into Photoshop it is brought in as a background layer
and you can't manipulate a BG layer.
 2. With the pen tool selected start at the top and place a point where there seem to be the start of a
main angle or a new line, try not to go crazy, will add more points in a bit. (For example, if you had a
square every corner would be the beginning of a new line/angle.)
2. With the pen tool selected start at the top and place a point where there seem to be the start of a
main angle or a new line, try not to go crazy, will add more points in a bit. (For example, if you had a
square every corner would be the beginning of a new line/angle.)
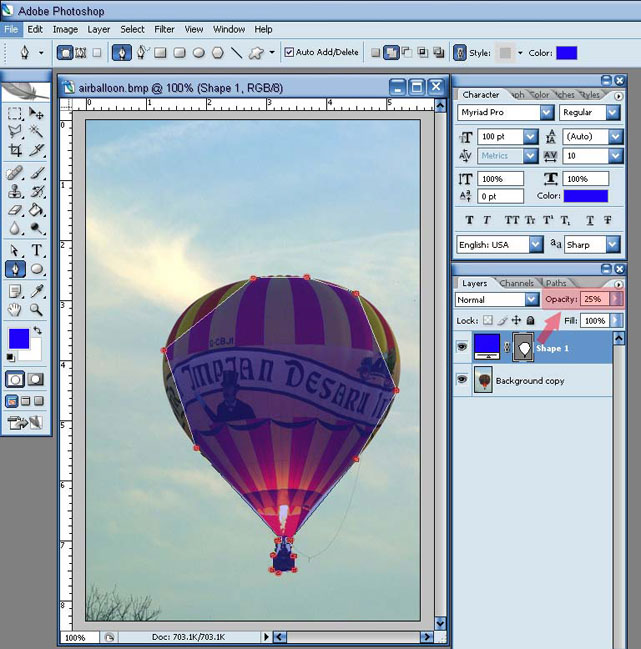 After you have about 3 points go over to you layers palate and change the Opacity for the shape layer to
about 25 percent. This way you can see what you're doing. When you get back to where you started click
on the very first point you made. A small circle will appear when your pen hovers over the first point
before you click on it.
After you have about 3 points go over to you layers palate and change the Opacity for the shape layer to
about 25 percent. This way you can see what you're doing. When you get back to where you started click
on the very first point you made. A small circle will appear when your pen hovers over the first point
before you click on it.
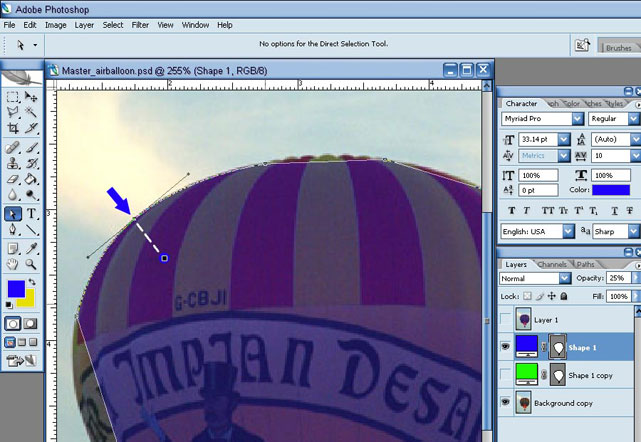
3. Now, zoom in to any page of the picture. Select the pen tool and find a spot that need to have an arch or needs more points. Hold down the "ctrl" button and click on the line. All the points that you have put in already should appear, if not "ctrl click" it again. Holding the "ctrl" button is a short cut for the "Direct Selection tool" You can also get to this by the tools palate or pressing A.
 4. Now, with just the pen tool click on the line where you want to add the point. Once you do that 3
dots will appear. The one in the middle is the point or anchor. The 2 to the sides are the arms that allow you
to change the shape of the line. Hold down "ctrl" (or press A) and drag the anchor to the edge of the
picture. If it does not fit properly play around with the arms until it does. Drag the arms up or down to
change the arch and drag them in or out to change the length of the arch. (Note: you have to use the Direct
Selection Tool to move points)
4. Now, with just the pen tool click on the line where you want to add the point. Once you do that 3
dots will appear. The one in the middle is the point or anchor. The 2 to the sides are the arms that allow you
to change the shape of the line. Hold down "ctrl" (or press A) and drag the anchor to the edge of the
picture. If it does not fit properly play around with the arms until it does. Drag the arms up or down to
change the arch and drag them in or out to change the length of the arch. (Note: you have to use the Direct
Selection Tool to move points)
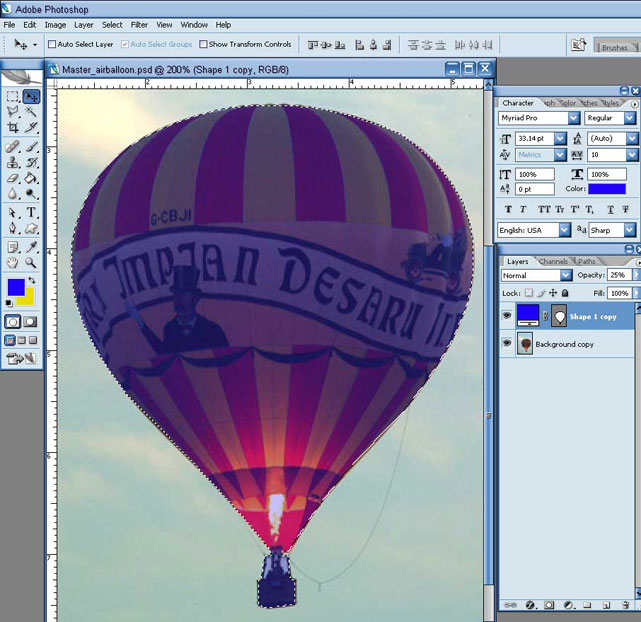
 5. Do this with the rest of the balloon until you have all of the points outlining the balloon. Don't
worry about the inside of the basket where the arms are. You will see how to fix those later. Your outline
should now look like this.
5. Do this with the rest of the balloon until you have all of the points outlining the balloon. Don't
worry about the inside of the basket where the arms are. You will see how to fix those later. Your outline
should now look like this.
 6. Now, select the Move tool (keyboard shortcut V). Hold down the "ctrl" key and click on the
outline layer of the balloon. In previous versions of Photoshop you could control click anywhere on the
desired layer within the layers palate, but in PS2 you must control click on the picture or shape within the
layers palate. (You will know you are doing it correctly when the white hand turns into a white hand with a
dotted square box.) Once you click on the layer your outline will become a dotted outline just like when
you use the marquee tool.
6. Now, select the Move tool (keyboard shortcut V). Hold down the "ctrl" key and click on the
outline layer of the balloon. In previous versions of Photoshop you could control click anywhere on the
desired layer within the layers palate, but in PS2 you must control click on the picture or shape within the
layers palate. (You will know you are doing it correctly when the white hand turns into a white hand with a
dotted square box.) Once you click on the layer your outline will become a dotted outline just like when
you use the marquee tool.
 7. Next select the layer that has the actual picture you want to crop so that it's highlighted in the
layers palate. In this tutorial it's the "Background copy" layer. Then, at the top menu, go to "Layer" –
"Layer Mask" – and select "Reveal Selection". Or you can just click the "Layer Mask" icon at the bottom
of the layers palate. Your image should now be cropped and look like this.
7. Next select the layer that has the actual picture you want to crop so that it's highlighted in the
layers palate. In this tutorial it's the "Background copy" layer. Then, at the top menu, go to "Layer" –
"Layer Mask" – and select "Reveal Selection". Or you can just click the "Layer Mask" icon at the bottom
of the layers palate. Your image should now be cropped and look like this.
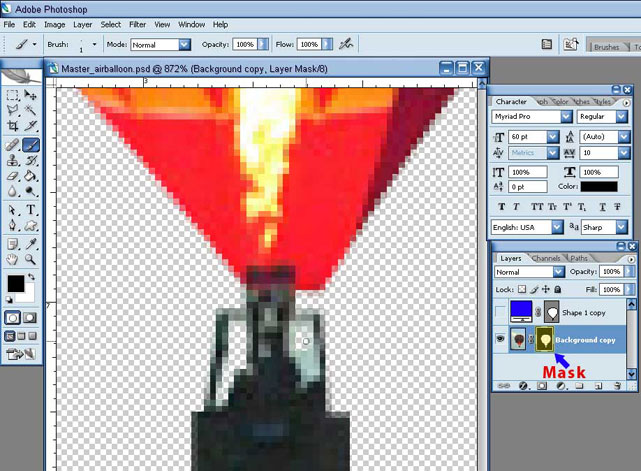
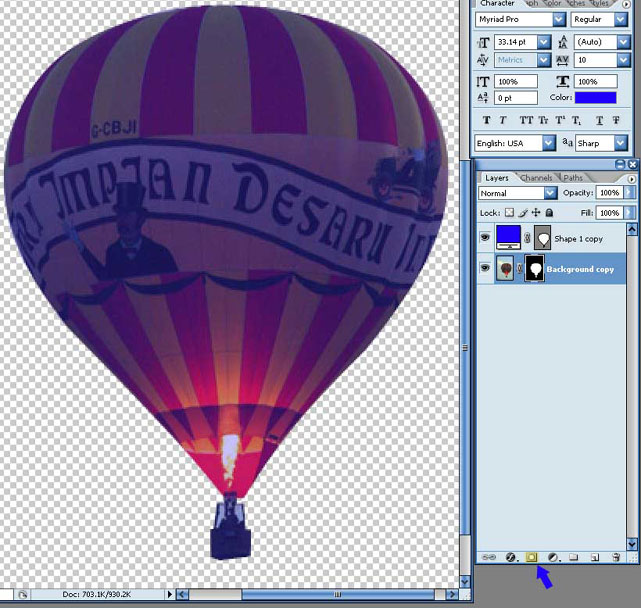 8. You can now turn off your "Shape" or the outline you made of the balloon. Now if you
remember the basket had arms that came up and attached to the balloon and you could see the sky in
between those arms. We are now going to fix that. Select the mask of your balloon layer, which is the
black/white outline next to your balloon image. Then select the brush tool (keyboard shortcut B). Your
colors turn to 100% black and white. If not you do not have the masked selected. Now, with the black
selected use your brush to and draw over the area you want to disappear. It will work like an eraser.
8. You can now turn off your "Shape" or the outline you made of the balloon. Now if you
remember the basket had arms that came up and attached to the balloon and you could see the sky in
between those arms. We are now going to fix that. Select the mask of your balloon layer, which is the
black/white outline next to your balloon image. Then select the brush tool (keyboard shortcut B). Your
colors turn to 100% black and white. If not you do not have the masked selected. Now, with the black
selected use your brush to and draw over the area you want to disappear. It will work like an eraser.
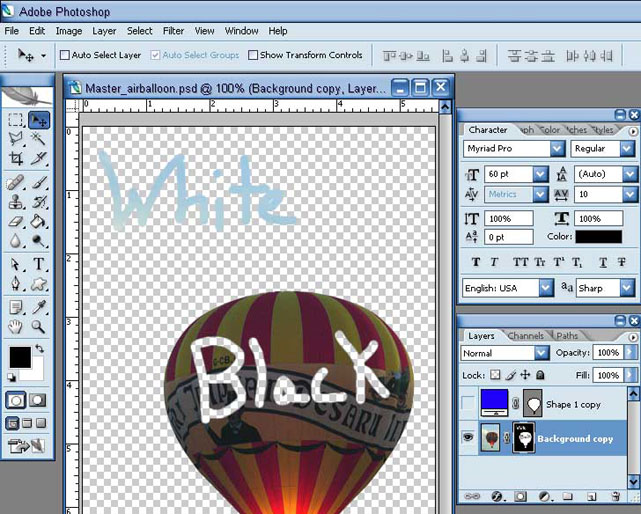
 9. Using the color white will add the image back. Experiment, select the white color and drag your
brush across the picture and watch how the image reappears. Or do it with the black color selected and
scribble over the picture. This really helps when you are cropping out hard object like people and hair. Best
of all it saves the picture and keeps you from having to duplicate the image a bunch of times, or make a
bunch of layer and so on.
9. Using the color white will add the image back. Experiment, select the white color and drag your
brush across the picture and watch how the image reappears. Or do it with the black color selected and
scribble over the picture. This really helps when you are cropping out hard object like people and hair. Best
of all it saves the picture and keeps you from having to duplicate the image a bunch of times, or make a
bunch of layer and so on.
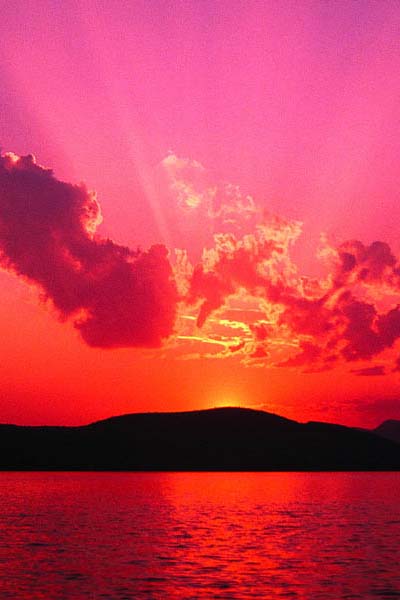
 10. Now you can add any background you want to your balloon image. I hope this tutorial was fun
and informative.
10. Now you can add any background you want to your balloon image. I hope this tutorial was fun
and informative.

2. With the pen tool selected start at the top and place a point where there seem to be the start of a
main angle or a new line, try not to go crazy, will add more points in a bit. (For example, if you had a
square every corner would be the beginning of a new line/angle.)
After you have about 3 points go over to you layers palate and change the Opacity for the shape layer to
about 25 percent. This way you can see what you're doing. When you get back to where you started click
on the very first point you made. A small circle will appear when your pen hovers over the first point
before you click on it.3. Now, zoom in to any page of the picture. Select the pen tool and find a spot that need to have an arch or needs more points. Hold down the "ctrl" button and click on the line. All the points that you have put in already should appear, if not "ctrl click" it again. Holding the "ctrl" button is a short cut for the "Direct Selection tool" You can also get to this by the tools palate or pressing A.
4. Now, with just the pen tool click on the line where you want to add the point. Once you do that 3
dots will appear. The one in the middle is the point or anchor. The 2 to the sides are the arms that allow you
to change the shape of the line. Hold down "ctrl" (or press A) and drag the anchor to the edge of the
picture. If it does not fit properly play around with the arms until it does. Drag the arms up or down to
change the arch and drag them in or out to change the length of the arch. (Note: you have to use the Direct
Selection Tool to move points)
5. Do this with the rest of the balloon until you have all of the points outlining the balloon. Don't
worry about the inside of the basket where the arms are. You will see how to fix those later. Your outline
should now look like this.
6. Now, select the Move tool (keyboard shortcut V). Hold down the "ctrl" key and click on the
outline layer of the balloon. In previous versions of Photoshop you could control click anywhere on the
desired layer within the layers palate, but in PS2 you must control click on the picture or shape within the
layers palate. (You will know you are doing it correctly when the white hand turns into a white hand with a
dotted square box.) Once you click on the layer your outline will become a dotted outline just like when
you use the marquee tool.
7. Next select the layer that has the actual picture you want to crop so that it's highlighted in the
layers palate. In this tutorial it's the "Background copy" layer. Then, at the top menu, go to "Layer" –
"Layer Mask" – and select "Reveal Selection". Or you can just click the "Layer Mask" icon at the bottom
of the layers palate. Your image should now be cropped and look like this.
8. You can now turn off your "Shape" or the outline you made of the balloon. Now if you
remember the basket had arms that came up and attached to the balloon and you could see the sky in
between those arms. We are now going to fix that. Select the mask of your balloon layer, which is the
black/white outline next to your balloon image. Then select the brush tool (keyboard shortcut B). Your
colors turn to 100% black and white. If not you do not have the masked selected. Now, with the black
selected use your brush to and draw over the area you want to disappear. It will work like an eraser.
9. Using the color white will add the image back. Experiment, select the white color and drag your
brush across the picture and watch how the image reappears. Or do it with the black color selected and
scribble over the picture. This really helps when you are cropping out hard object like people and hair. Best
of all it saves the picture and keeps you from having to duplicate the image a bunch of times, or make a
bunch of layer and so on.
10. Now you can add any background you want to your balloon image. I hope this tutorial was fun
and informative.


0 comments:
Post a Comment