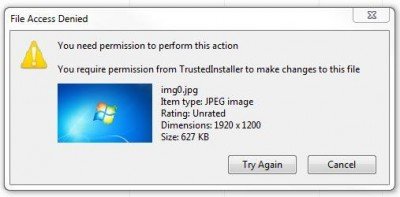
Some of the main problem we face with Windows 7, is its permissions issues! Most of them think its annoying. Here are a few tips which will help resolve such issues.
Most of the time you might find difficult opening files from a external hard drive after upgrading to Windows 7. Such cases you could try to give permission to that folder.
1. Most of the times the folder permission or the Owner would be set to “Trusted Installer” such cases you’ll get this message that “You don’t currently have permission to access this folder”.
In such cases you could Take Ownership of the folder or file to open it or to get access to it. There are various methods to Take Ownership. The easiest way is to use the Take Ownership Shortcut on Context Menu.
One important thing you have to remember about this is that you should use it wisely. The reason I am stressing this point is, because I have seen lot of situation where people will try to Take Ownership of System files or folders. Altering permission might cause your System to crash.
For instance, you might see Document and Settings folder under C drive of Windows 7 computer. People who have upgraded from Windows XP, might be not know about “Users” instead of Document and Settings. So if they try to access it and will get the permission error. Document and Settings it’s just a junction point for compatibility with older programs. Always stay away from Windows, Program Files etc.
2. Let’s say you gave permission but it still fails to open or edit. The next thing I would do is turn off UAC or User Account Control. Sometime UAC might block permission. Make sure to turn it back on once you have carried out the change.
How to Disable User Account Control?
1) Click the Windows Start button and then click Control Panel. The Control Panel appears
2) Select Large icons on the right-hand side under the View by menu (if you are not already in Large icons view). This will display the Control Panel features as icons. Locate and click on User Accounts.
3) The User Accounts panel appears.
4) Click the Change User Accounts Control Settings option. The User Accounts Control Settings dialog box appears.
5) Windows 7 UAC settings have a slider to change between different notification levels
6) Change to Never notify
Note: A reboot of the computer will be required after choosing this setting.
Once you complete your Task change the slider to “Notify me only when programs try to make changes to my computer”.
3. If disabling that UAC didn’t do the trick, the next steps is to Enable the Built-in administrator account. Built-in Administrator is a hidden administrator account on Windows 7, which is created while installing the OS. There will be no restrictions under this account. Make sure you disable it after using it.
How to Enable Built-in Administrator account?1) Click the Windows Start button and type in CMD
2) Right Click on CMD and click on Run as administrator
3) Command prompt will open up then type in
net user administrator /active:yes
Hit Enter you’ll get a message “Command ran successfully”
Type net user administrator <Password>, and then press ENTER.
Note: Please replace the <Password> tag with your passwords which you want to set to administrator account.
To disable the administrator account net user administrator /active:no
4. If that fails then something is wrong with your Operating System. Sometimes registry settings might get messed up. In those cases we could try to reset the default security permissions.
1) Click the Windows Start button and type in CMD2) Right Click on CMD and click on Run as administrator
3) Command prompt will open up then type in
secedit /configure /cfg %windir%\inf\defltbase.inf /db defltbase.sdb /verbose
Check this Microsoft KB313222 for more info about this command.
Restart the computer and test it.
5. If that doesn’t help then try to run the System File Checker.
1) Click the Windows Start button and type in CMD
2) Right Click on CMD and click on Run as administrator
3) Command prompt will open up then type in SFC /SCANNOW
6. If none of the above steps helped then you might be looking at a corrupted operating system. Try to run a Repair Install or a Clean Install.


0 comments:
Post a Comment