Friends

This is default featured post 1 title

Go to Blogger edit html and find these sentences.Now replace these sentences with your own descriptions.This theme is Bloggerized by Lasantha Bandara - Premiumbloggertemplates.com.

This is default featured post 2 title

Go to Blogger edit html and find these sentences.Now replace these sentences with your own descriptions.This theme is Bloggerized by Lasantha Bandara - Premiumbloggertemplates.com.

This is default featured post 3 title

Go to Blogger edit html and find these sentences.Now replace these sentences with your own descriptions.This theme is Bloggerized by Lasantha Bandara - Premiumbloggertemplates.com.

This is default featured post 4 title

Go to Blogger edit html and find these sentences.Now replace these sentences with your own descriptions.This theme is Bloggerized by Lasantha Bandara - Premiumbloggertemplates.com.

This is default featured post 5 title

Go to Blogger edit html and find these sentences.Now replace these sentences with your own descriptions.This theme is Bloggerized by Lasantha Bandara - Premiumbloggertemplates.com.

Sunday, January 23, 2011

Virtual Box3.0.6 r52128 with Ubuntu Intrepid (Upgrade OS from Ubuntu Gutsy to Intrepid)

This is my experience when I replaced my old Gutsy with Intrepid.
When I use Linux, I always divide my hard disc into 3 partitions, System, Swap and /Home. It’s a good idea because next time you want to replace your OS, you will not lost all your /Home data.
For your Virtual Box, you will still have most all of your old configuration and the image file. When I did this upgrade, I still have my old virtual box setup and my OS image inside it.
I said not all because the ‘saved state‘ you can’t get it back. You have to press the ‘Discard‘ before you can use it. But it’s ok, only take few seconds for an OS to reboot.
Below are the steps.
First, go the virtual box website and download the program.


Open your Linux Terminal (Applications > Accessories > Terminal) and type ‘sudo dpkg -i virtualbox-3.0_3.0.6-52128_Ubuntu_intrepid_i386.deb‘ to start the installation.
virtual_box_intrepid2

This error occur because I still don’t have the ‘vboxusers’ in Intrepid group. Just add it (System > Administration > User and Groups).
virtual_box_intrepid3
virtual_box_intrepid6

Without a suitable kernel module you will not be able to start the Virtual Box, so just press ‘yes’ to start the compilation.
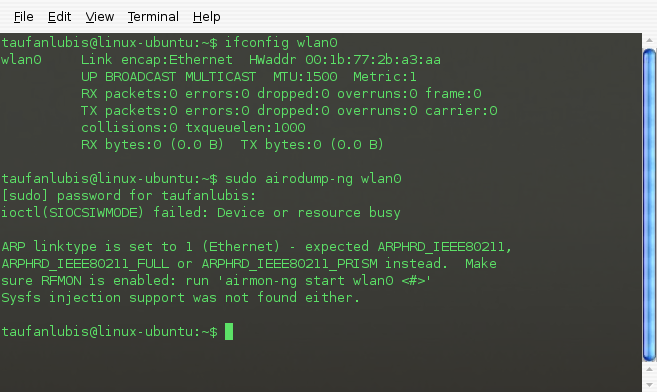
How to fix ‘ioctl(SIOCSIWMODE) failed: Device or resource busy ‘ problem.

Airodump-ng is one of favorite tools in hacking wireless network. When I upgrade my ubuntu from Gutsy to Intrepid, I can’t run this application anymore. It’s not application error because I can run it in Gutsy version before. My wireless card chip set is ‘ipw3945′. The error message is a bit complicated as you see below.

_________________________________________
ioctl(SIOCSIWMODE) failed: Device or resource busy

ARP linktype is set to 1 (Ethernet) – expected ARPHRD_IEEE80211,
ARPHRD_IEEE80211_FULL or ARPHRD_IEEE80211_PRISM instead. Make
sure RFMON is enabled: run ‘airmon-ng start wlan0 <#>’
Sysfs injection support was not found either.
_________________________________________
Mean that if you want your airodump-ng run, you will need to try to fix the bolds problems above. Your problem may be one of it but in my case not even one of the error message.
Try to figure out the answer quite some times which is actually is very simple.
It’s only change the ipw3945 chip set mode from ‘Managed‘ to ‘monitor‘.
Step 1. Check your chip set mode

7 Easy Steps Installation DNS server in Ubuntu Jaunty

DNS (Domain Name Service) server is a server that translate an IP address into a name that will be easy to remember or do the opposite way. The administrative job is done in Server side. For client side just set the machine to connect the DNS server.
Before we start, I assume that you are connected to Internet already. For, text editor, you can use any program that you are familiar with. In this sample, I use vim.
The installation is as easy as below:
Step 1. Install the bind9
Open Linux Terminal (Applications>Accessories>Terminal), type: sudo apt-get install bind9

Installation finished.


Step 2. Edit file /etc/bind/named.conf
Edit file /etc/bind/named.conf, at Linux Terminal type: $sudo vim /etc/bind/named.conf and add the codes below:

—————————————————-
include “/etc/bind/named.conf.options”;

zone “1.168.192.in-addr.arpa” {
type master;
file “/etc/bind/ip.db”;
};
zone “myserver.loc” {
type master;
file “/etc/bind/www.db”;
};

Free Online Storage with upload.to

Free Online Storage is a free on-line storage space where you can upload, download or share your data in the Internet. With high speed Internet connection available at the moment is good alternative for media storage instead of flash disc because you can get your data at any place in the world as long as there is Internet connection. Step 1. Registration.
Open you your browser and type: http://uploaded.to.


The registration process is very easy, just scroll down and type your email address.

That’s it, very easy.

Now, check your email. You will receive an email with activation link.
Click the link.

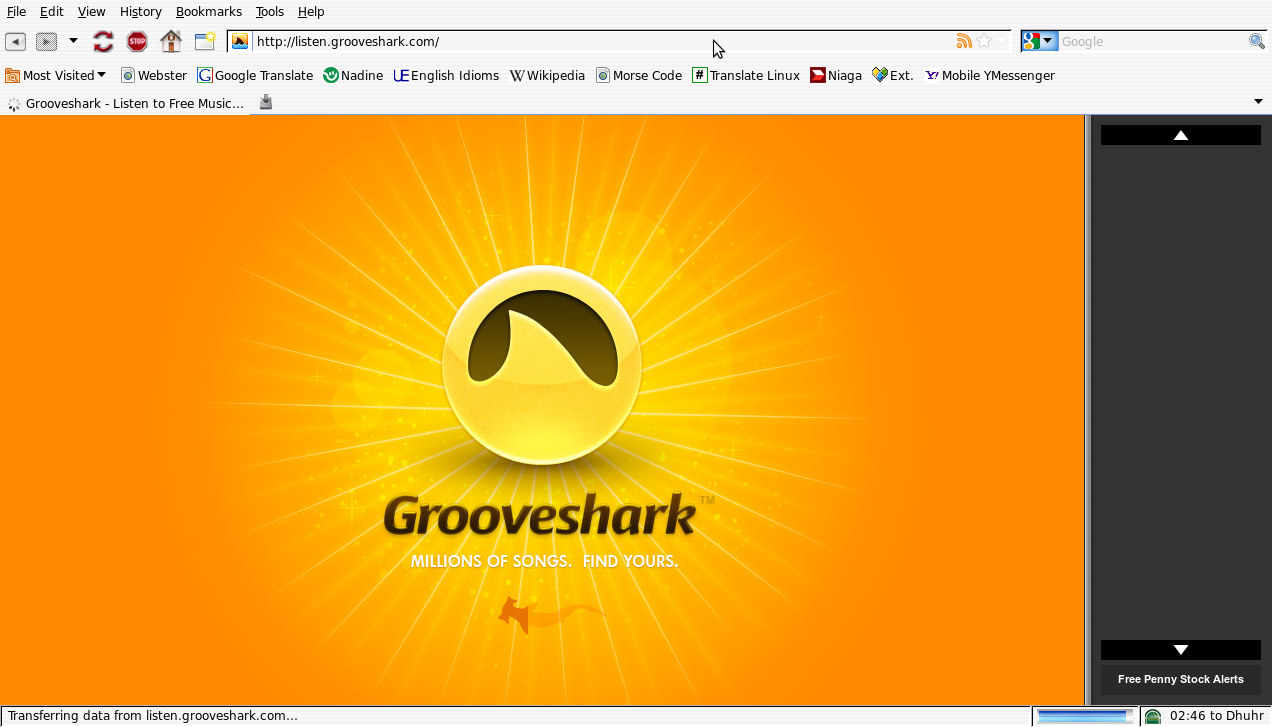
Grooveshark – Free Online Music Service Station

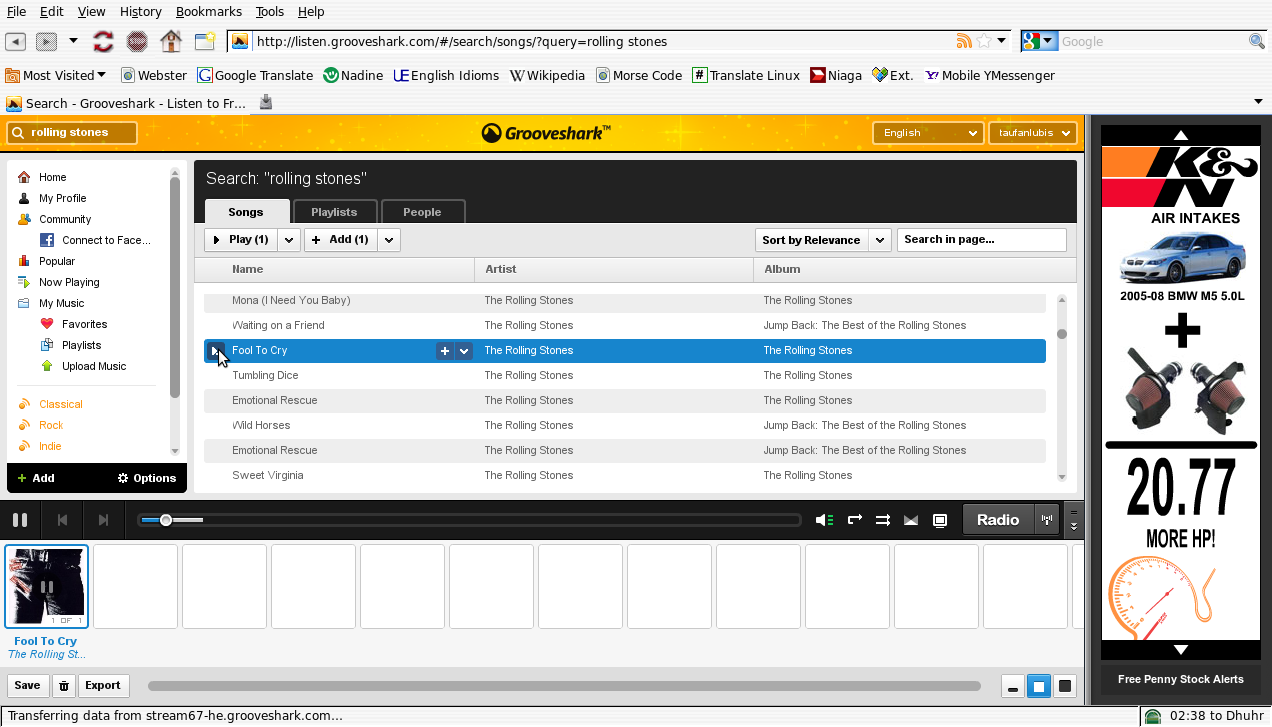
Grooveshark a free on-line music station that is easy to use with millions of songs and fast streaming. You can listen a very good quality sound music without any interrupt or delay. I don’t talk about using high Internet speed connection. I just use my laptop with 3G connection through my mobile phone as modem. As I said, it’s very easy to use. Just open your browser and type: “www.grooveshark.com”.


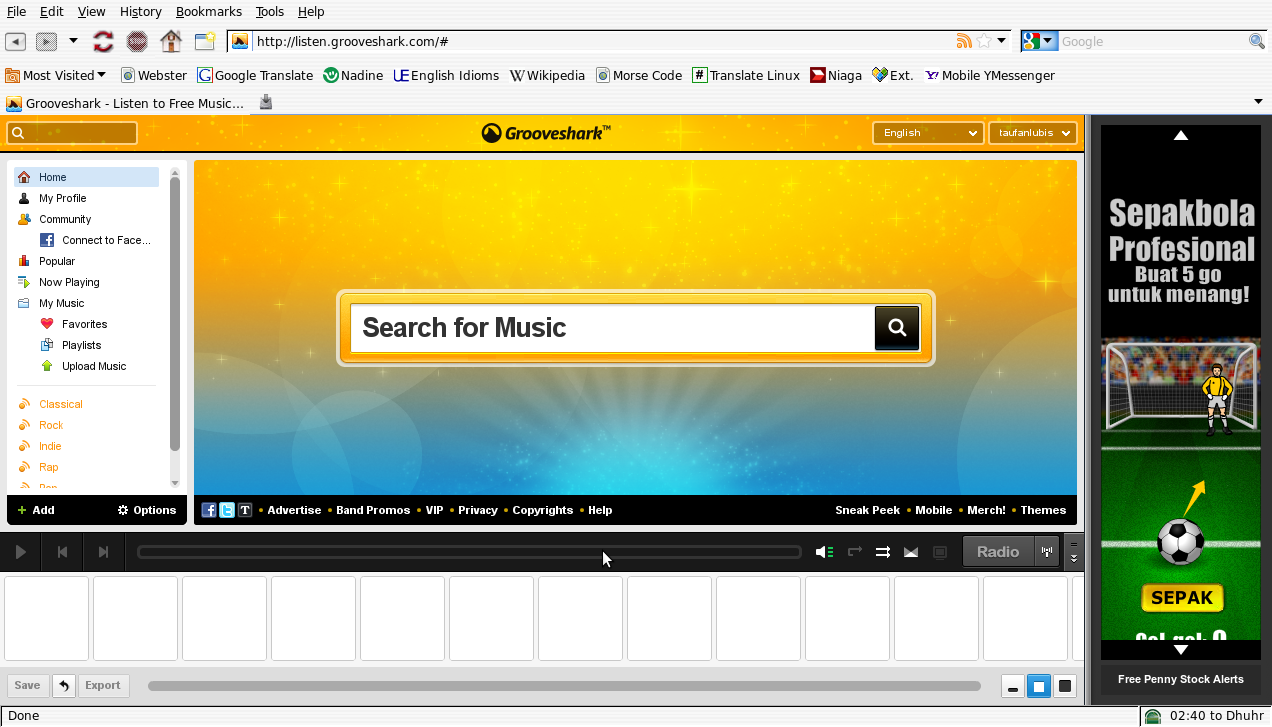
Type any group music that you like to hear in ‘Search text box’.

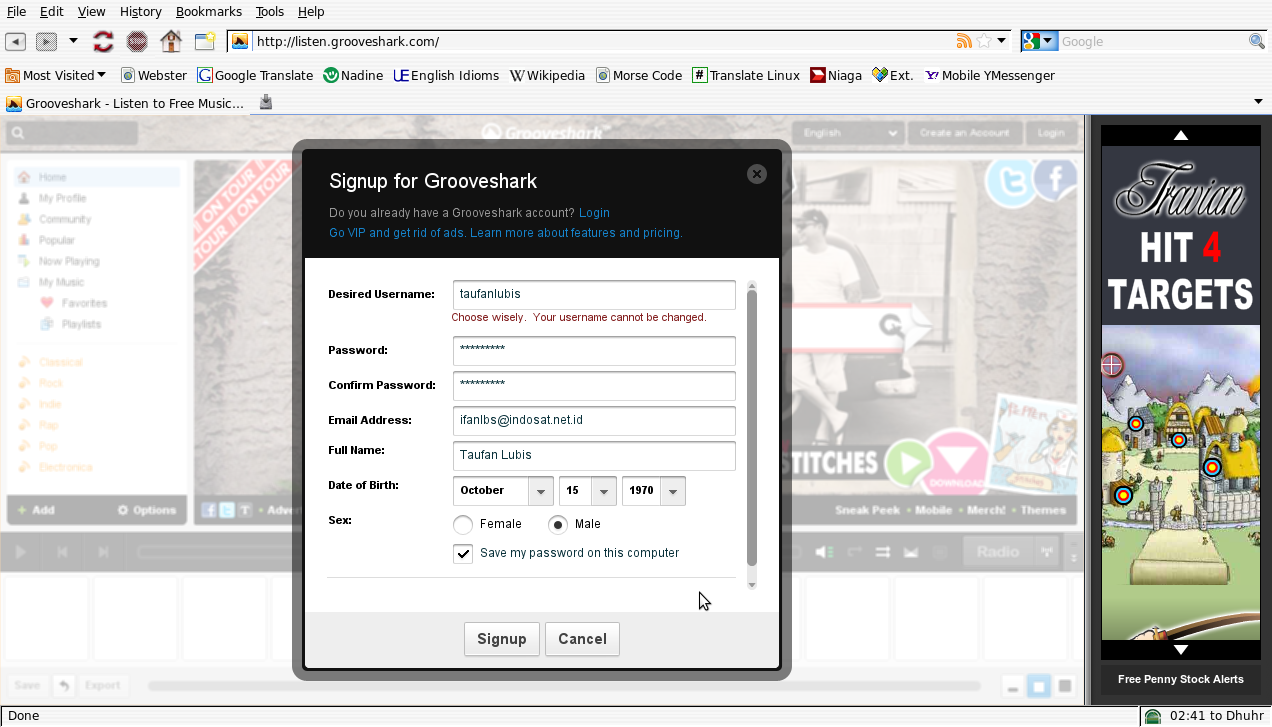
Or if you want to join the grooveshark community, you can sign up it first.

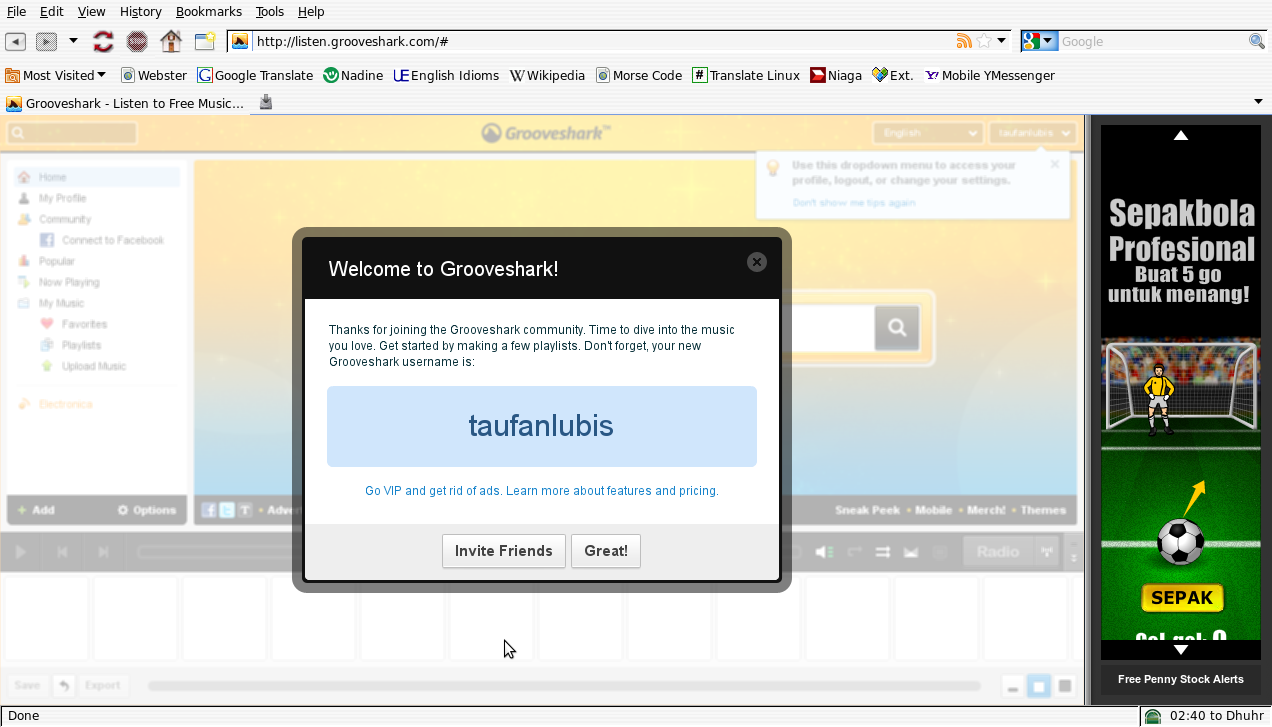
Sign up process is finished.

In this sample, I choose my favorite group music, ‘rolling stones‘. So, I just type ‘rolling stones‘.

Grooveshark will list down all songs from rolling stones.

Now, I click ‘Fool to cry‘ and choose ‘play‘ on the left title song.

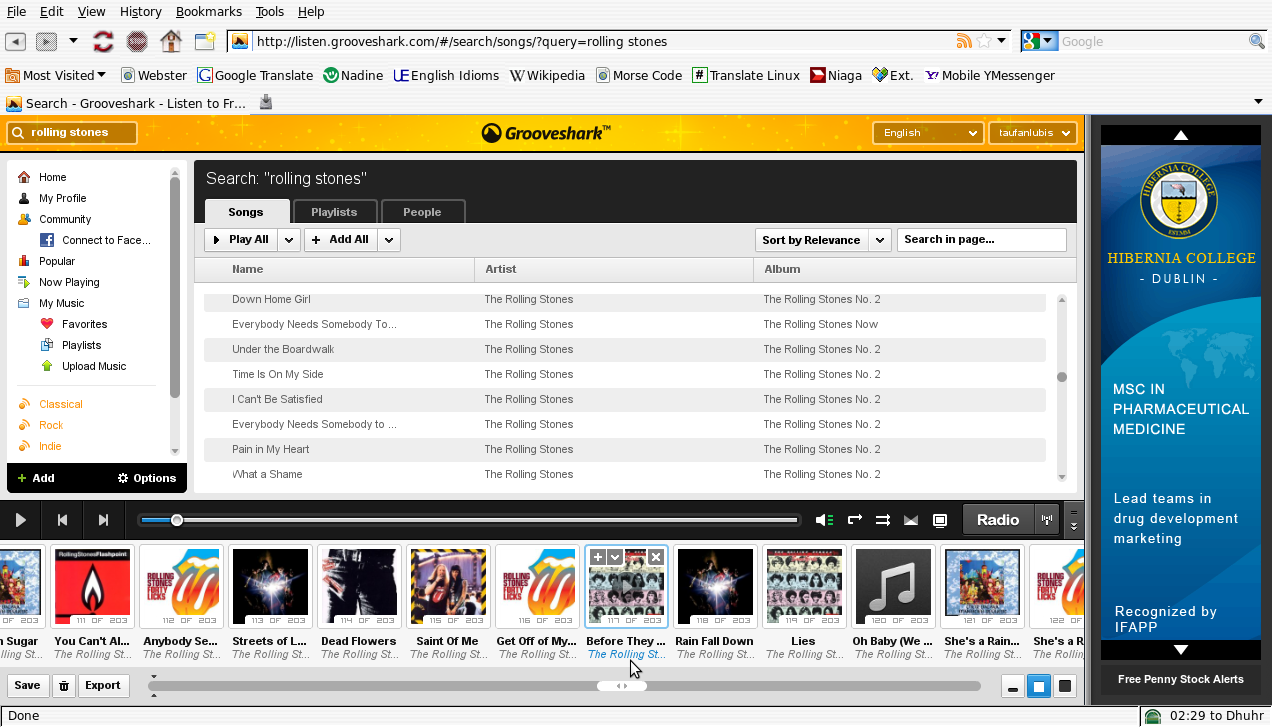
It will start playing immediately.

You can save it as your play list. To save it as play list, click ‘save’ button on the left bottom corner. Enter the play list title and click ‘save’ button to save.

You can add your selected songs or add all songs by click ‘Add all‘ button.

To access your save play list, click ‘playlist’ menu on left main menu.
Happy trying.

Can’t empty Evolution Trash bin – Error while expunging folder

I don’t know it’s a bug or not but ‘Error While expunging folder‘ error message in Evolution is very annoying. You can’t empty your Trash bin mean if you don’t solve your evolution local database will become bigger and bigger. There are few solutions you can get from the Internet. I wrote this article for easier solution with very clear instructions.
As you can see from the below picture, at the bottom screen, this error suddenly occur when I tried to empty my Evolution trash (File > Empty Trash).

Now, I will show you how to fix this problem.

First thing first, back up your emails. In case, a worst thing happen you still have a back up.
From the main menu choose (File > Backup Settings).

Select any folder where you want to put your backup file and type a filename.
I suggest to start with ‘Year-Month-Date-description‘ format file name. It will make you easier for tracing at the time you need in the future.

The backup process is in about to begin. Press ‘yes‘ button to start the process.

Backup process is on progress.

After you backup your emails, close your evolution.
Now open your file browser.
Go to evolution/mail/local folder. My location is ‘/home/taufanlubis/.evolution/mail/local‘, your one is only different after /home/your_one/…………..
The folder is hidden so you have to set your file browser to enable ‘Show hidden files‘.
Select ‘View > Show hidden files‘ to enable it then go to evolution folder.

Select any files that start with ‘.cmeta‘ and ‘.index‘.
DON”T select ‘.data‘ files.

After you select the files, click right mouse button and choose ‘Move to Trash‘.

After you deleted the files, open again your evolution.
Now, you can empty your trash.
As you can see below, the process is success.

As I said, you need to back up your emails first. Because, the process it may not 100% success.
When I did my one, I hope the whole process is success but I still got one email that is irrecoverably corrupted.
Well, hope that this article is clear enough and help you to solve the problem.

How to install Airodump-ng and Aireplay-ng in Lucidlynx

What is Airodump-ng and Aireplay-ng? If you are familiar in wireless hacking then I believe that these both tools are your best friends.
For the one who are still new in hacking, Airodump-ng is wireless packet capture, simple but very powerfull. It will capture raw 802.11 frames. Airodump-ng writes out a text file about the details of all access points and clients seen.
Aireplay-ng is a tool for injecting packet into a wireless network to generate traffic.
I will not explain how to use these tools in here, but how to install it in Ubuntu Lucidlynx.
If you are still using the previous Ubuntu version, you still can apply the same methods.
Can I install using ‘apt-get install’ command in LucidLynx terminal?
You can’t.


Airodump-ng and Aireplay-ng are part of aircrack-ng packages. So, you just install aircrack-ng then these both tools will automatically available.
Make sure you are connected to the Internet then open your Lucid Lynx terminal (Application > Accessories > Terminal).
Type $sudo apt-get install aircrack-ng.

Installation done.

Now, both airodump-ng and aireplay-ng are available in your system.

How to install Xampp?

Many people know from their own experience that it’s not easy to install an Apache web server and it gets harder if you want to add MySQL, PHP and Perl.XAMPP is an easy to install Apache distribution containing MySQL, PHP and Perl. XAMPP is really very easy to install and to use – just download, extract and start. Just download it from: http://www.apachefriends.org/en/xampp.html
Install xampp using command line:
$sudo tar xvzf xampp-linux-1.6.2.tar.gz -C /opt
$cd /opt/lampp
$sudo ./lampp start
or you can choose which service that you only want to run.
Usage: ./lampp <action>
start Start XAMPP (Apache, MySQL and eventually others)
startapache Start only Apache
startssl Start only SSL support
startmysql Start only MySQL
startftp Start only ProFTPD
stop Stop XAMPP (Apache, MySQL and eventually others)
stopapache Stop only Apache
stopssl Stop only SSL support
stopmysql Stop only MySQL
stopftp Stop only ProFTPD


reload Reload XAMPP (Apache, MySQL and eventually others)
reloadapache Reload only Apache
reloadmysql Reload only MySQL
reloadftp Reload only ProFTPD
restart Stop and start XAMPP

security Check XAMPP’s security
php5 Activate PHP5
php4 Activate PHP4
phpstatus Which version of PHP is active?

backup Make backup file of your XAMPP config, log and data files
panel Starts graphical XAMPP control panel

To test it, just open your web browser (Firefox) then type: http://localhost
If the installation process is correct then you will see the xampp main page.

install XAMPP

XAMPP is an easy-to-use multi-platform package that installs Apache, MySQL, PHP, phpMyAdmin, and a whole slew of other software useful for dynamic web development on your computer. Installation is painless, and configuration minimal. This page guides you through installing the package on both Windows and Mac OS X. You can also read general notes about using XAMPP.

Installing on Windows

  1. Go to http://sourceforge.net/project/showfiles.php?group_id=61776 and click "XAMPP Windows". If necessary, click the "1.7" link to expand the appropriate version, and choose to download xampp-win32-1.7.0-installer.exe.
    XAMPP Control Panel in Windows
    The XAMPP Control Panel in Windows
  2. Run the installer. If you want, you can choose to install the Apache and MySQL servers as services, which will make them start automatically every time you start Windows. If you don't choose this option, you will need to use the XAMPP Control Panel application to start the servers individually each time you need them. This may be desirable if you don't intend to use your servers that often.
  3. Upon completion of installation, the XAMPP Control Panel will open (if not, click Start » All Programs » Apache Friends » XAMPP » XAMPP Control Panel). This tool lets you start and stop the various servers installed as part of XAMPP.
  4. Start Apache and MySQL by clicking on the "Start" buttons next to each item. If prompted by Windows Firewall, click the button labelled "Unblock".
  5. Go to http://localhost/. If you are directed to a page with the XAMPP logo, your installation was successful. Congratulations!
You can add or change the files in C:\xampp\htdocs to change what you see at http://localhost/ on any local web browser. You may need to delete index.php in that directory to stop the server from automatically redirecting you to the XAMPP configuration interface.
Here are the locations of some configuration and log files you may want to view or change:
TypeLocation
Apache configurationC:\xampp\apache\conf\httpd.conf,
C:\xampp\apache\conf\extra\*.conf
Apache logsC:\xampp\apache\logs\access.log,
C:\xampp\apache\logs\error.log
PHP configurationC:\xampp\php\php.ini
MySQL configurationC:\xampp\mysql\bin\my.cnf

Installing on Mac OS X

  1. Go to http://sourceforge.net/project/showfiles.php?group_id=61776. Choose "XAMPP Mac OS X".
    XAMPP Control Panel in Windows
    The XAMPP Control Panel in Mac OS X
  2. Choose to download xampp-macosx-0.7.4.dmg.
  3. Double-click the Disk Image file you just downloaded.
  4. In the window that opens, double-click XAMPP for MacOS X.pkg.
  5. Once installation completes, go to your Applications folder, and go inside the xampp folder inside.
  6. Double-click on XAMPP Control Panel. This tool lets you start and stop the various servers installed as part of XAMPP.
  7. Start Apache and MySQL by clicking on the "Start" buttons next to each item. Note that you will need to repeat these steps if you reboot your computer and wish to use Apache and/or MySQL.
  8. Go to http://localhost/. If you are directed to a page with the XAMPP logo, your installation was successful. Congratulations!
You can add or change the files in /Applications/xampp/htdocs to change what you see at http://localhost/ on any local web browser.
Here are the locations of some configuration and log files you may want to view or change:
TypeLocation
Apache configuration/Applications/xampp/etc/httpd.conf,
/Applications/xampp/etc/*.conf
Apache logs/Applications/xampp/xamppfiles/logs/access_log,
/Applications/xampp/xamppfiles/logs/error_log
PHP configuration/Applications/xampp/etc/php.ini
MySQL configuration/Applications/xampp/etc/my.cnf

Notes about XAMPP

Note that "localhost" (often resolving to the reserved IP address 127.0.0.1) is a special name defined in the DNS system as a name that a host uses to reference itself, using the loopback interface. URLs that refer to "http://localhost/" can only be used on the system with XAMPP installed. However, by default, XAMPP configures Apache to allow connections from outside your system, so people on your network, or in some cases users from anywhere in the world, may be able to access your Apache-served files using your IP address.
You can go to http://localhost/phpmyadmin/ to use the locally-installed copy of phpMyAdmin, a tool useful for manipulating your MySQL databases in a graphical environment.
On the Windows version of XAMPP, you can use the command-line interface (CLI) version of PHP at C:\xampp\php\php.exe. On Mac OS X this is located at /Applications/xampp/xamppfiles/bin/php. If you want to be able to execute PHP by simply typing "php" at the command line in either operating system, you need to add the directory containing PHP (C:\xampp\php on Windows and /Applications/xampp/xamppfiles/bin on Mac OS X) to your "path" variable. There are tutorials available for doing this on Windows and on Mac OS X.
If you want to fine-tune your Apache, MySQL, or PHP settings, you can go to http://localhost/xampp/ to view and change parts of your XAMPP configuration. If you are feeling especially adventurous, you can also hand-tweak the configuration files in the XAMPP installation directory.
Note that XAMPP may tell you that PHP is insecure because it is not running in "safe mode". However, PHP's safe mode feature is considered a broken security measure (and has been removed in the next version, PHP 6.0) and should not be enabled.

Saturday, January 22, 2011

driver toshiba satellite c640 for xp

untuk mendownload nya klik tulisan di bawah ini =


driver audio


driver grapich amd


driver vga intel


driver synaptic touchpad driver


driver webcam


driver lan atheros


driver WLAN atheros


hotkey utility for display


TOSHIBA Common Moduleo


TOSHIBA Power Saver


Touchpad On/Off Utility


ConfigFree


Realtek Card Reader Driver


TOSHIBA Control


TOSHIBA Service Station


silahkan di klik driver di atas ,

PENTING =

yang paling utama , instal lah TOSHIBA COMMON MODULE , karena software ini
berfungsi sebagai pengatur manajemen laptop toshiba , sepeti kecerahan layar

Wednesday, January 19, 2011

Quickly Change Proxy Setting with Proxy Switcher

Most of the offices today are equipped with firewall and proxy server and you need to enter the proxy setting to ensure that your laptop have access to Internet. But if you are using direct internet connection at home, then you have to manually change it back using the browser settings. With Proxy Switcher, your tasks are simplified. It is a simple freeware tool which runs from system tray and enables users to quickly change the proxy settings. Proxy Switcher
Proxy Switcher disables proxy server settings when you click on the Home button, similarly when you select office, proxy is enabled. Proxy Switcher even informs your Windows environment of the changes so you don’t need to restart applications such as Internet Explorer or MSN Messenger when the proxy settings change.
System Tray Options
There is also an Auto option, which automatically check and change to proxy server when needed. The application works well on Windows 7 as well.
Download Proxy Switcher

Add Digital Signature to PDF Documents

JSignPdf is a freeware tool written in Java which enables users to add digital signatures to PDF documents. It can be used as a standalone application or as an Add-On in OpenOffice.org. The application is open source and require Java Runtime to run. You can add visible signatures to PDF files in the form of image or description location anywhere in the document and specified. It comes with pretty good features for the signatures. JSignPDF
Using the Visible signature settings, you can specify the location of your digital signature in the PDF file.
Features;
  • Visible signatures – image and/or description located visually in a PDF file (page and position can be specified)
  • Several different keystore types (as provided by Java)
  • Timestamps from authority in signature (TSA)
  • Certificate validation through CRL and/or OCSP
  • Setting certification level
  • Setting hash algorithm
  • PDF encryption and setting rights
  • Comprehensive Swing GUI
  • Support for batch processing (controlled by command line arguments, without GUI)
JSignPDF is very simple and yet a powerful tool to add digital signatures to PDF files.
Download JSignPDF

Merge HTML, CSS or Text Files with Net.FilesJoiner

Net.FilesJoiner is a handy freeware application which allows users to join html, CSS or txt or XML files. The application is portable and can easily do the job of merging files. For Html files, it can be merged with or without Styles (CSS) or images. The interface is very simple, just select the type of file you want to merge (HTML, CSS, txt or XML) and then select the files using the browse button. Once selected, you can easily sort files in the order you want it to appear. Merge 
HTML Files
Right mouse Click to open the menu for opening or saving files for specified formation, selecting all items, deleting selected items from the List and options.
Join 
options
In the options we can define a text line as separator between the merged files or header / footer Tags for html files.
The application is compatible with Windows XP, Vista and Windows 7.
Download  Net.FilesJoiner

Merge HTML, CSS or Text Files with Net.FilesJoiner

Net.FilesJoiner is a handy freeware application which allows users to join html, CSS or txt or XML files. The application is portable and can easily do the job of merging files. For Html files, it can be merged with or without Styles (CSS) or images. The interface is very simple, just select the type of file you want to merge (HTML, CSS, txt or XML) and then select the files using the browse button. Once selected, you can easily sort files in the order you want it to appear. Merge 
HTML Files
Right mouse Click to open the menu for opening or saving files for specified formation, selecting all items, deleting selected items from the List and options.
Join 
options
In the options we can define a text line as separator between the merged files or header / footer Tags for html files.
The application is compatible with Windows XP, Vista and Windows 7.
Download  Net.FilesJoiner

Merge HTML, CSS or Text Files with Net.FilesJoiner

Net.FilesJoiner is a handy freeware application which allows users to join html, CSS or txt or XML files. The application is portable and can easily do the job of merging files. For Html files, it can be merged with or without Styles (CSS) or images. The interface is very simple, just select the type of file you want to merge (HTML, CSS, txt or XML) and then select the files using the browse button. Once selected, you can easily sort files in the order you want it to appear. Merge 
HTML Files
Right mouse Click to open the menu for opening or saving files for specified formation, selecting all items, deleting selected items from the List and options.
Join 
options
In the options we can define a text line as separator between the merged files or header / footer Tags for html files.
The application is compatible with Windows XP, Vista and Windows 7.
Download  Net.FilesJoiner

Listen and Record any Radio Station Online

TapinRadio is a simple and reliable freeware application that allows you to listen to your favorite radio stations on the Internet. Apart from listening to radio stations all over the world, you can also record them. The interface of the application is very simple and easy to use, you can either search for a station or pick from the huge list of stations based on genre or location. Once you select a station, double click on the station to start streaming. TapinRadio
Once you start playing a radio station, the application automatically displays specific information on it: genre, stream link, sound quality, name of the playing song and its duration. You can start taping the song at any time by hitting the “Record” button available.
The list of presets is quite large and lots of new stations are added every day. Although not all stations work perfectly, there are lots to choose from. You can increase their number by adding your own radio URLs.
Features;
  • Plenty of stations to choose from
  • Supports most of the internet radio formats – mp3, wma, ogg vorbis, aac+ and so on
  • Quick and reliable search
  • Smooth switching between stations
  • Record what you are listening to – including separate song files
  • Automatic checking for software and stations
  • Runs on Windows XP, Vista, Windows 7 (32 and 64 bit)
  • Show your favorites in groups
  • Sleep timer to shutdown TapinRadio or even your computer!
The best feature of TapinRadio is its ease of use and its vast collection of radio stations that gets increased with new presets every day and its recording feature. The application also comes in portable flavour which makes it even more better.
Download TapinRadio

Set Different Mouse Speeds for Touchpad and Mouse- Autosensitivity

AutoSensitivity is a freeware tool for laptop users which allows you to define different mouse sensitivities (speeds) for your touchpad and mouse. Apart from defining mouse speeds, it can also automatically switch between them (based on mouse connect / disconnect). You simply define two different speeds and the utility automatically switches between them according to you plugging or unplugging your mouse. Auto 
Sensitivity
  • Microsoft Windows XP / Vista / 7
  • Microsoft .NET Framework 3.5 / 4.0
You can get the current mouse speed set using the options. Once you have selected the speed, click the apply button and then minimize the tool. You can also run the program at Windows startup.
Download AutoSensitivity

GrooveShark and Last.fm Desktop Player for Windows- GrooveWalrus

GrooveWalrus is a freeware tool for Windows which allows users to listen to songs from Grooveshark and Last.fm service from their desktop. Grooveshark and Last.fm are two popular online music streaming sites and GrooveWalrus brings them to desktop. You can search for any artist and easily stream the songs using this player. You can also created your own playlist using the search. The player comes with lots of options. GrooveWalrus
The interface is very neat and easy to use. Another great feature is the support for Plug-ins, there is some nice plugins to make the listening experience better. The player comes with support for lyrics and you can view the lyrics of the song playing.
Lyrics
Another nice feature is web remote, you can control the desktop player using any remote PC connected to Internet.
Remote
WebRemote
GrooveWalrus works perfectly on Windows 7 as well. It is a nice player to have especially if you are a Grooveshark or Last.fm user.

#
### ###